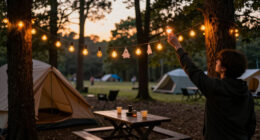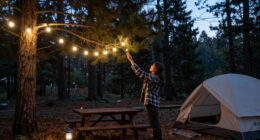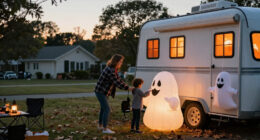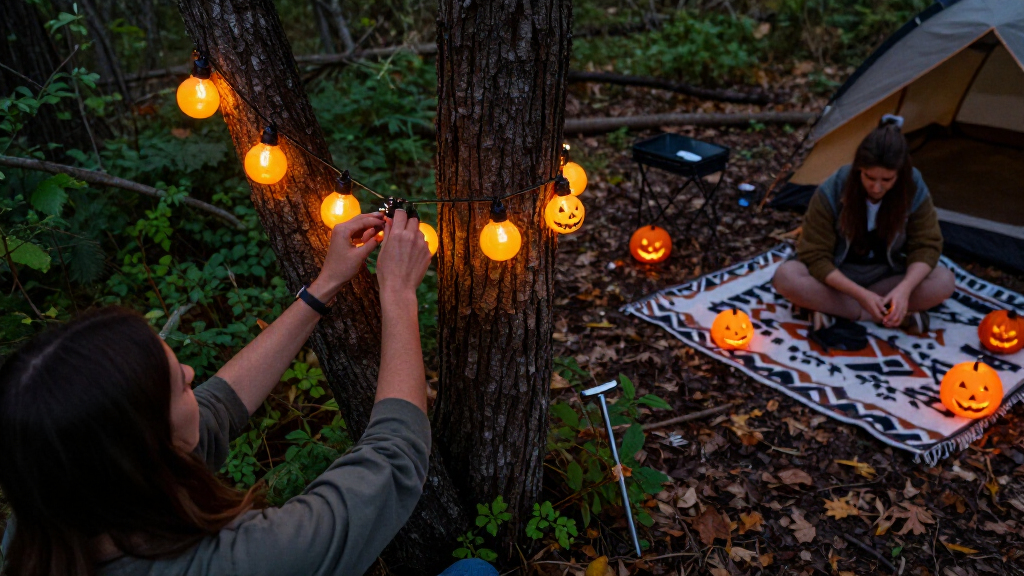
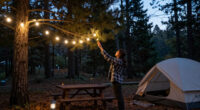
Hang and test spooky outdoor string lights for a Halloween display that looks eerie without creating electrical or trip hazards. This beginner-friendly guide covers choosing weather-rated lights, planning the layout, securing supports, adding simple effects, and checking the finished installation. Allow about 1–2 hours, depending on the size of the area and whether you need to install hooks or poles.

Get travel and outdoor gear delivered free — and shop member deals
- Fast, free delivery on millions of items
- Access to Prime Big Deal Days deals on October 6–7
- Prime Video, Amazon Music and more included

Dazzle Bright 200 LED Halloween Mini String Lights, 80 ft, Purple, Orange and Green
- ✔ Total length: 80 ft
- ✔ Lighted length: 65 ft
- ✔ Lead wire: 16.5 ft

112 ft Smart RGB Color-Changing String Lights with 300 LEDs, App and Remote Control
- ✔ Total length: 112 ft
- ✔ Lighted length: 99 ft
- ✔ Lead wire: 13 ft
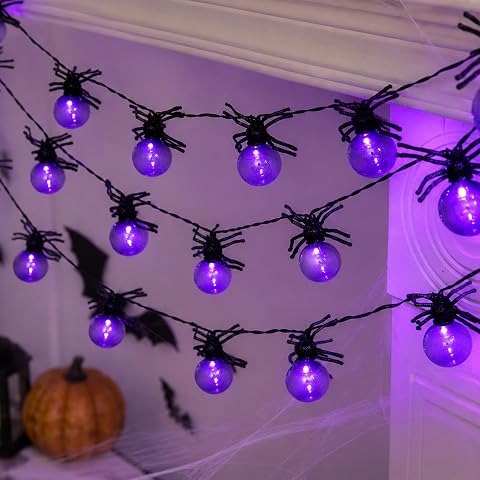
Halloween Spider String Lights, 10 LED, Purple Glow, 5.4 ft
- ✔ Length: 5.4 ft
- ✔ Light count: 10 LED spider lights
- ✔ Light color: Purple
Difficulty: Beginner | Time: 1–2 hours
What You’ll Need
Tools & Materials:
- Outdoor-rated LED string lights with matching outdoor-rated connectors
- Tape measure
- Outdoor-rated hooks, clips, or cable ties suited to the mounting surfaces
- Ladder rated for your weight, if required
- Outdoor-rated extension cord, only if needed
- Optional: outdoor-rated timer, dimmer, or low-voltage lighting controller
- Optional: weather-resistant decorations such as faux cobwebs or lightweight fabric
Knowledge:
- Basic measuring and use of hand tools
- Ability to recognize an outdoor electrical rating, such as an appropriate wet-location rating on the lights and accessories
- Safe ladder use, if mounting lights above ground level
Check the manufacturer’s instructions, including the maximum number of connected light strings and the permitted use of extension cords. Use lights and accessories rated for the exposure at your installation site. Plug into a ground-fault circuit interrupter (GFCI)-protected outdoor receptacle. Do not install lights near overhead power lines, block doors or walkways, or attach them to gutters or branches that cannot support them.
Dazzle Bright 200 LED Halloween Mini String Lights, 80 ft, Purple, Orange and Green
Dazzle Bright is our best overall pick because it balances a clearly Halloween-ready palette with enough length to decorate more than a single small feature. Purple, orange, and green communicate the season immediately, while eight lighting modes let us vary the look without needing an app. At 80 feet total, it is a more practical starting point for a porch edge, railing, or several sections of a yard than NWLIGHT’s 5.4-foot spider strand.The 65-foot lighted portion is the figure to use when planning coverage; the remaining 16.5 feet is lead wire, which helps reach a socket but does not add illuminated length. The option to connect up to three strings can support a larger display, although it also means more cord management and a nearby power source. Compared with the smart RGB model, Dazzle Bright gives up individually customizable colors and app control in favor of simple seasonal colors and button-based operation. Its IP44 rating is a stated water-resistance rating, not permission to submerge it or leave electrical connections exposed. Choose it for broad seasonal décor; skip it if you need battery placement or precise color programming.
Pros:
- Purple, orange, and green give the display an immediate Halloween look.
- 80 feet total, including a 65-foot lighted section, suits larger decorating runs.
- Eight modes offer some variety without app setup.
- Can connect with up to three strings for an expandable display.
Cons:
- Requires a corded power source, limiting placement away from outlets.
- Button control is less flexible than the smart RGB set’s app and remote.
- IP44 does not mean the lights or connections are suitable for submersion.
Best for: People decorating a porch, railing, or yard section who want familiar Halloween colors and substantial corded coverage.
Not ideal for: Shoppers without a convenient outlet, or anyone who needs app-based effects, one-off color selection, or a very compact accent.
Bottom line: We recommend Dazzle Bright for most Halloween yard displays because its seasonal colors and useful length matter more here than advanced smart controls.
“We recommend Dazzle Bright for most Halloween yard displays because its seasonal colors and useful length matter more here than advanced smart controls.”
112 ft Smart RGB Color-Changing String Lights with 300 LEDs, App and Remote Control
When we want spooky colors one evening and a different look for the rest of the season, the 112-foot smart RGB set is the most versatile option. Its 300 LEDs can be adjusted through an app or remote, with 16 million RGB colors, 73 scene modes, and 34 dynamic modes listed. That breadth makes it possible to move beyond fixed Halloween colors and tailor brightness and effects to a porch, party, or other occasion. Music synchronization, timers, memory, and group control add convenience for a more involved setup.That flexibility puts it ahead of Dazzle Bright for customization, but not necessarily for an uncomplicated outdoor installation. The supplied information gives two different ingress ratings—IP44 in the description and IPX7 in the specifications. We cannot resolve that discrepancy from the listing, so we would not assume the more protective rating applies to every component. The product also specifically says to keep the plug away from water. Like Dazzle Bright, it is corded; unlike the spider lights, it cannot be placed independently of an outlet. The light string itself is 99 feet, with another 13 feet of lead wire. This is the pick for buyers who value control and reuse over a dedicated spider or Halloween-color design, and a poor match for anyone who wants an uncomplicated, confidently weather-exposed setup.
Pros:
- App and remote provide extensive color, brightness, and effect control.
- Music sync and numerous scene and dynamic modes support party-focused displays.
- Timer and memory functions can simplify recurring use.
- 112 feet total provides a long run, including 13 feet of lead wire.
Cons:
- The listing conflicts between IP44 and IPX7 water-resistance claims.
- The plug must be kept away from water, requiring careful placement.
- Corded power restricts where the lights can be installed.
Best for: Decorators who want to program Halloween colors and effects, then reuse the same lights for other outdoor or indoor occasions.
Not ideal for: Anyone who needs battery power, a clearly consistent weather-resistance specification, or an outdoor power connection that can be left exposed.
Bottom line: We’d choose this set for adaptable, app-controlled Halloween lighting only when we can protect the power connection and account for the conflicting rating.
“We’d choose this set for adaptable, app-controlled Halloween lighting only when we can protect the power connection and account for the conflicting rating.”
Halloween Spider String Lights, 10 LED, Purple Glow, 5.4 ft
For the strongest Halloween motif in the smallest package, NWLIGHT’s spider strand is the clear specialist. Its 10 purple LED spiders make the theme more explicit than either multicolor strand, which can look seasonal but do not use character-shaped lights. At only 5.4 feet, this is best treated as a detail for a doorway, small railing section, shelf, or party table—not as the main lighting plan for a yard. Dazzle Bright covers far more ground, and the smart RGB set is much longer and more adaptable.Battery power is the key advantage: two AA batteries let us place the strand where a cord would be awkward, and a built-in timer can reduce the need to switch it on and off manually. The batteries are not included, so they need to be provided separately. Its IP44 rating is for water resistance, not submersion; we would still keep battery and electrical components out of wet conditions beyond the stated use. The short length and single purple color make it less flexible for buyers seeking a coordinated, bright perimeter. Choose it as a small, unmistakably spooky accent alongside other decorations, not as a substitute for long outdoor string lights.
Pros:
- Spider-shaped purple lights make the Halloween theme unmistakable.
- Battery power allows flexible placement away from outlets.
- Built-in timer supports automatic operation.
- IP44 water resistance is listed for indoor and outdoor decorative use.
Cons:
- At 5.4 feet, it covers far less space than either corded option.
- Two AA batteries are required and are not included.
- One purple color provides less visual flexibility than the smart RGB set.
Best for: People adding a small, spider-themed purple accent to a doorway, tabletop, or compact decorative display without needing an outlet.
Not ideal for: Anyone trying to illuminate a long fence, wrap a large patio, or create a broad display with multiple colors.
Bottom line: We’d use these spider lights as a portable Halloween accent, but not as the primary string-light solution for a yard.
“We’d use these spider lights as a portable Halloween accent, but not as the primary string-light solution for a yard.”
As an Amazon Associate we earn from qualifying purchases.
Before You Start
Choose the effect before buying or hanging anything: warm amber light can make a porch feel haunted, while dim purple or green LEDs can color a wall or shrubbery. Use lights labeled for outdoor use, and check that every cord, connector, timer, and extension cord is also suitable for outdoor exposure. Keep connections elevated and protected as directed by the manufacturer; never wrap a connection in plastic in a way that traps moisture.
Plan to work in dry conditions during daylight. Do not connect or adjust lights while they are wet. If a ladder is needed, place it on firm, level ground and have another adult steady it. Do not use a ladder near power lines or reach sideways from it.
Step-by-Step Instructions
Step 1: Choose the display area
Walk the area where you want the lights and pick a route that can be supported by walls, porch posts, a fence, or purpose-installed poles. Mark the intended start point, endpoint, and power outlet. Decide whether the display will outline a doorway, trace a roof edge, weave through a fence, or illuminate shrubs. Keep the route away from vehicle paths, doors that must open, and places where people could catch a cord with a foot or mobility aid.
Tip: Use a simple route with fewer corners and fewer connectors. Do not attach lights to power lines, fragile branches, or metal surfaces that may become hot.
Check: You can trace the full route on foot, identify secure mounting points, and reach a GFCI-protected outlet without running a cord across a walkway.
Step 2: Measure and select the lights
Measure each straight section of the planned route and add the lengths to find the total needed. Include a little slack at corners, but do not plan to stretch a string tightly. Choose outdoor-rated LED lights in the color and brightness you want, then check the package for bulb spacing, string length, connector type, and the maximum number of strings that may be linked. Buy enough length for the route without exceeding the manufacturer’s connection limit.
Tip: LED lights use less electricity than many older incandescent strings, but follow the product’s stated limits rather than estimating how many can connect.
Check: The package ratings match the site’s exposure, and the total string length and connection plan cover the route within the manufacturer’s limits.
Step 3: Inspect the lights and supplies
Before installation, lay each string out on dry ground and inspect the wire, bulbs, plugs, and sockets. Set aside any string with cracked insulation, loose sockets, corrosion, damaged bulbs, or a plug that feels loose. Check hooks and clips for the material they are designed to hold, and confirm that the extension cord and timer are rated for outdoor use if they are part of the plan.
Tip: Do not repair a damaged string with tape or use indoor-only accessories outdoors. Replace defective equipment.
Check: Every light string and accessory is intact, compatible, and marked for the intended outdoor conditions.
Step 4: Install mounting points
Attach outdoor-rated hooks or clips to solid mounting surfaces at intervals that prevent the cord from sagging into a walkway. Follow the fastener instructions for the surface, and avoid drilling where wiring or plumbing may be hidden. For a route without suitable supports, use stable, purpose-made poles installed according to their instructions. Do not rely on adhesive hooks unless their manufacturer specifically rates them for outdoor use and the expected load.
Tip: Keep the mounting points high enough to avoid head contact, but work from a properly placed ladder rather than standing on furniture or leaning from a window.
Check: The supports are firmly attached, evenly spaced, and positioned so the planned light route will not obstruct movement.
Step 5: Hang the lights without tension
With the lights unplugged, start at the end nearest the outlet and clip the cord into each support. Leave a small, even dip between supports instead of pulling the wire taut. Secure the cable itself with clips; do not crush it with staples, nails, or tight ties. Keep bulbs from pressing against leaves, fabric, or other materials, and leave the manufacturer’s required clearance around the lights.
Tip: Use a helper to hand up the string and keep it from dragging. Do not climb while carrying an awkward coil of lights.
Check: The string follows the planned route, stays supported at each mounting point, and has no pinched, stretched, or ground-level sections.
Step 6: Route the power connection safely
Place the plug connection and any extension-cord connection where they will not sit in puddles, collect water, or get crushed by a door. Use only outdoor-rated cords and connection covers approved for the equipment and setup. Route cords along a wall or other protected edge; if a cord must cross a walking route, reroute the display or use a suitable cord protector rather than leaving it exposed. Plug the lights into a GFCI-protected outdoor receptacle.
Tip: Keep plugs accessible so you can disconnect the display quickly. Do not connect more strings or extension cords than the product instructions allow.
Check: All connections are protected from expected exposure, the cord does not create a trip hazard, and the power source has GFCI protection.
Step 7: Add spooky effects and test the display
Add lightweight decorations around, not over, the lights. Keep fabric, faux cobwebs, and paper away from bulbs, plugs, and connectors; wind can move decorations onto hot or energized parts. If using a timer or controller, install it as directed and set a short test schedule. With the area clear and dry, turn on the lights and inspect the full route from the ground. Check for dark sections, glare into neighbors’ windows, and cords or decorations that move into a walkway.
Tip: For a more unsettling look, use one or two color zones or a slow, gentle fade if the lights support it. Avoid rapid flashing where it could bother visitors or passersby.
Check: The lights operate across the full display, the chosen effect is visible from the intended viewing area, and nothing blocks access or touches an unsuitable surface.
Common Mistakes to Avoid
- Using indoor-only lights, extension cords, or timers outside. — Check the outdoor-use marking on every electrical item, not just the light string, and follow the product instructions for wet or damp locations.
- Stretching the string tightly or supporting it only at the ends. — Install enough suitable clips to support the wire evenly and leave modest slack between points so wind does not pull on the connections.
- Leaving a cord or plug connection on the ground or across a path. — Route power along a protected edge, keep connections elevated and protected as specified, and use a suitable cord protector if a crossing cannot be avoided.
- Exceeding the permitted number of connected strings. — Read the product’s connection limit and power requirements before linking strings; use a separate approved outlet or display plan if the route needs more.
Troubleshooting
Problem: The lights do not turn on.
Solution: Unplug the string before inspecting it. Check that plugs are fully seated, the outlet has power, and the GFCI has not tripped. Reset the GFCI only if the equipment and area are dry. If it trips again, disconnect the lights and have the outlet or equipment checked rather than repeatedly resetting it.
Problem: A section of the string is dark or flickering.
Solution: Turn off and unplug the lights. Check for a loose bulb or connector only as permitted by the manufacturer, and inspect for damage or moisture. Replace a faulty string; do not use one with damaged insulation or a loose socket.
Problem: The string sags or shifts in wind.
Solution: Switch off and unplug the display, then add or reposition outdoor-rated supports. Do not tighten the cord until it is taut. Remove the lights during severe weather if the manufacturer advises it or the supports cannot keep the display stable.
Problem: The timer or controller does not follow the schedule.
Solution: Check its outdoor rating, power connection, selected mode, and clock or schedule settings. Test the lights directly at the outlet. If they work there but not through the controller, follow the controller’s reset instructions or replace it with a compatible model.
What Success Looks Like
The finished display follows the planned route, stays securely supported, and creates the intended spooky effect from the viewing area. All lights work steadily, cords and connections are outdoor-rated and protected as directed, the installation uses a GFCI-protected outlet, and no wire, decoration, or support obstructs a doorway or walking route. The display remains stable when gently checked from the ground.
Next Steps
Set the timer to switch the lights off when they are not needed, and check the display after wind or heavy rain. Before handling, unplug the lights and wait until they are dry. At the end of the season, remove decorations and lights without pulling on the cord, inspect the equipment, and store it dry in a labeled container. Replace damaged strings or accessories before using the display again.
Frequently Asked Questions
Can I use regular indoor string lights outside?
No. Use string lights labeled for outdoor use and match their rating to the exposure at the installation site. Use outdoor-rated cords, timers, and connectors as well.
How high should I hang outdoor string lights?
Hang them high enough that people cannot bump into them, while keeping them within the reach of a safely positioned ladder or other approved access method. Follow the product’s clearance instructions and keep the route clear of doors and walking paths.
Can I connect several light strings together?
Only if the manufacturer permits it, and only up to the stated maximum. Check the exact light model’s instructions; limits can vary even between similar-looking products.
What should I do if the outdoor outlet trips the GFCI?
Unplug the lights and check that the plugs and connections are dry and undamaged. Reset the GFCI only after the area is safe and dry. If it trips again, stop using the setup and have the outlet or equipment inspected.
Fall Picks
fall essentials
As an affiliate, we earn on qualifying purchases.