Installing vinyl wall decor is an easy way to upgrade your space. To start, measure your wall and clean the surface to ensure a secure bond. Use painter’s tape to position your decal and check for levelness before sticking it on. Begin at the top edge and smoothly peel the release liner down, using a squeegee to remove any air bubbles. After applying, check for any edges lifting and seal them for extra durability. Allow 24 hours for it to set undisturbed for optimal results. Stay tuned for more tips and tricks for a seamless installation!
Key Takeaways
- Measure your wall and use painter's tape to visualize decal placement before applying for optimal alignment and aesthetics.
- Clean the wall thoroughly with appropriate products and ensure it's completely dry for effective adhesion.
- Temporarily secure the decal with painter's tape and use a level tool to ensure proper alignment before final application.
- Apply the decal starting from the top edge, smoothing it down with a squeegee to eliminate air bubbles.
- Inspect and seal edges post-application, allowing the decal to set undisturbed for at least 24 hours for best results.

PAOFIN 71" Tall Metal Pantry Storage Cabinet with Doors and 4 Adjustable Shelves, White Kitchen Food Pantry Cabinets, Tall Freestanding Cupboard for Kitchen, Dining Room or Living Room
**Durable Metal Construction**: The PAOFIN 71" Metal Kitchen Pantry Storage Cabinet is crafted from high-quality metal, ensuring long-lasting...
As an affiliate, we earn on qualifying purchases.
Preparation and Planning
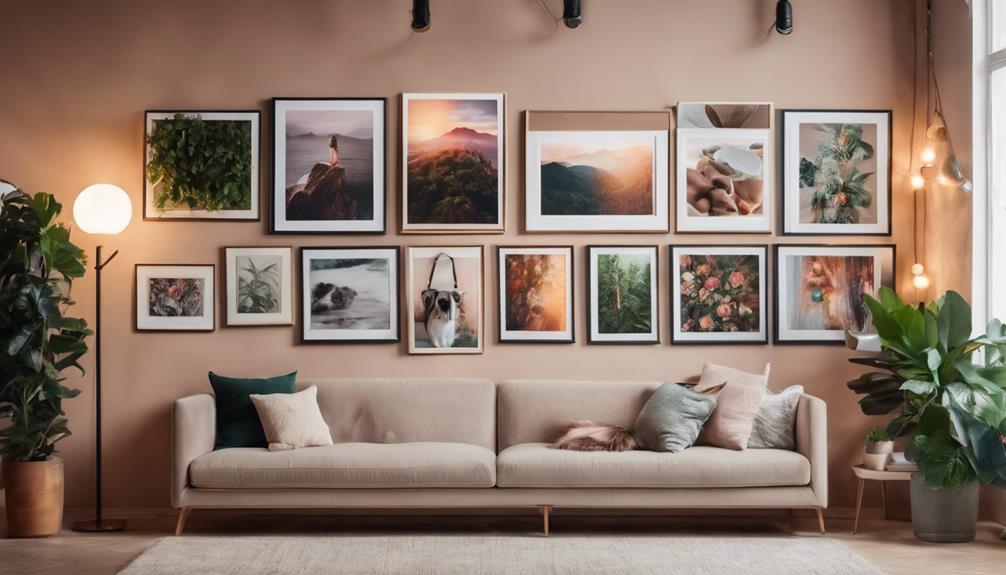
Before you apply a vinyl wall decal, it's important to measure the wall space to confirm a perfect fit and enhance your room's decor. Start by measuring the dimensions of the area where you want to place the decal. This guarantees it won't be too big or too small for the space.
Next, prepare your wall by making sure it has a clean surface. You'll want to wipe away any dust or grease that could affect adhesion.
Once your wall is clean, use painter's tape to temporarily position the decal. This allows you to visualize how it'll look and make any necessary adjustments before the final application.
After positioning, grab a level to make certain your decal is straight. This step is essential for achieving an even appearance that complements your decor. If it looks off, take the time to adjust it.
Proper preparation and planning can greatly impact the final result, so don't rush through these initial steps. By measuring, cleaning, and using painter's tape, you're setting yourself up for a successful and visually appealing installation.

GAIOUS Metal Pantry Cabinet, Kitchen Pantry Storage Cabinets with 2 Door and 3 Adjustable Shelves, White Kitchen Pantry Cabinet, Freestanding Cupboard for Dining Room Living Room Bathroom
『♕High-quality Material』The kitchen pantry storage cabinet is made of large-sized thickened cold-rolled steel plates, each shelf can withstand...
As an affiliate, we earn on qualifying purchases.
Surface Cleaning

Before you apply your vinyl wall decor, you need to make certain the surface is spotless.
Using the right cleaning products will help eliminate any dirt or grease that could affect adhesion, so don't skip this step.
Also, remember to let the wall dry completely to guarantee a strong bond.
Importance of Clean Surfaces
A clean wall surface is vital for guaranteeing that your vinyl wall decor adheres properly and lasts without peeling or lifting. When you take the time to clean the surface thoroughly, you remove dirt, oil, and dust, which are essential for ideal adhesion. If these contaminants remain, they can create barriers that prevent the adhesive on your decal from bonding effectively.
To achieve the best results, use a multi-surface cleaner and a lint-free cloth to wipe down the area. This method will guarantee that any residues that could hinder adhesion are eliminated.
After cleaning, allow the wall to dry completely before applying your decor. Moisture can negatively impact the adhesive's effectiveness, leading to premature peeling or lifting.
For an even more thorough clean, consider using isopropyl alcohol as a final wipe down. This step can help eliminate any stubborn dirt that might still linger.
Recommended Cleaning Products
To guarantee your vinyl wall decor adheres well, choosing the right cleaning products is key. A clean surface free from dirt or oil promotes ideal adhesion, so here are three products you should consider:
- Multi-Surface Cleaner: This effectively eliminates dirt, dust, and grease from your wall. Look for a non-abrasive formula to prevent damage.
- Iso-Propyl Alcohol (IPA): For a more thorough clean, IPA can help remove any stubborn residue. While this step isn't mandatory, it's beneficial for promoting the best surface preparation.
- Lint-Free Cloth: Use this for wiping down the walls after cleaning. It prevents fibers from sticking to the surface, which could interfere with your vinyl decal's stickiness.
Before applying your vinyl decal, make sure to clean the surface thoroughly. Avoid using abrasive cleaners or sponges, as they can damage the wall and affect adhesion.
Once you've cleaned, allow the wall to dry completely to maximize the effectiveness of your vinyl decor. By following these recommendations, you'll set the stage for a successful installation!
Drying Time Considerations
Allowing the cleaned wall surface to dry completely for at least 30 minutes is crucial for achieving ideal adhesion of your vinyl decal. After you've finished cleaning, verify no residual moisture remains on the surface. If you used isopropyl alcohol (IPA) for cleaning, wait a few minutes for it to evaporate completely. This step helps prevent peeling or air bubbles once your decal is applied.
Keep in mind that if you're working with a freshly painted wall, you'll need to wait 2-3 weeks for it to cure before applying your vinyl decor. Moisture from the paint can greatly hinder adhesion, leading to disappointing results.
Additionally, consider the application temperature, as it should ideally be between 60-80 degrees Fahrenheit. Colder surfaces can negatively affect adhesion, so confirm your wall is within this range before you proceed.
To summarize, paying attention to drying time and verifying a completely dry surface will help you achieve a flawless application of your vinyl wall decor. Taking these drying time considerations seriously can make all the difference in the longevity and appearance of your wall decor.

Yaheetech Kitchen Pantry Storage Cabinet with Drawer, Freestanding Pantry Cabinets with 2 Adjustable Shelves, 72.5" Tall Storage Cupboard for Kitchen/Dining Room/Bathroom/Hallway, Black
【Flexible Storage Organizer】Features a single center drawer with one fixed and one adjustable shelf hiding in both the...
As an affiliate, we earn on qualifying purchases.
Decal Positioning

When it comes to decal positioning, start by using painter's tape to temporarily place your decal on the wall.
This lets you visualize the arrangement and make adjustments for accuracy.
Don't forget to check for levelness to guarantee your decal looks perfect once applied.
Temporary Tape Placement
Using painter's tape for temporary placement lets you easily adjust the decal's position on the wall before committing to the final application. This method guarantees that you can achieve the perfect look while minimizing any potential mistakes.
Here's how to effectively use temporary tape placement:
- Secure the Decal: Apply strips of painter's tape to hold the decal in place on the wall. This allows you to reposition it without damaging the surface.
- Mark Light Guidelines: Use a pencil to mark light guidelines on the wall. This will help you align the decal accurately and guarantee it fits well in the intended space.
- Assess Decal Placement: Step back and assess the decal's placement to guarantee it aligns with your desired aesthetic. If adjustments are needed, gently lift the decal and re-tape it until you achieve the perfect alignment.
Leveling for Accuracy
After securing your decal with painter's tape, leveling it for accuracy guarantees a polished and professional appearance. Begin by using a level to check that your vinyl wall decor is perfectly horizontal or vertical. This step is essential for achieving the desired aesthetic.
Next, mark a light line on the wall beneath the level. This line will serve as a guide for your decal placement, guaranteeing consistent alignment throughout the installation process. Make minor adjustments to the tape as needed to achieve the best fit.
Before finalizing your installation, always double-check the bubble in the level. A misaligned decal can detract from the overall look, so take the time to verify everything is perfectly straight. If you don't have a traditional level handy, consider using a smartphone leveling app for added convenience.
Here's a quick reference table to keep you organized:
| Step | Action | Tool Needed |
|---|---|---|
| 1 | Check alignment | Level |
| 2 | Mark light line | Pencil or chalk |
| 3 | Adjust tape for alignment | Painter's tape |
| 4 | Double-check before securing | Level or app |
Following these steps guarantees your vinyl wall decor looks impeccable.
Visualizing Desired Arrangement
Temporarily taping the decal in place allows you to visualize its arrangement and make any necessary adjustments before the final application. This step is essential for guaranteeing the decal enhances your space as intended.
Here are three tips to help you during this process:
- Step Back: After you place the decal, take a few steps back to evaluate its fit within the selected area. This perspective helps you see if it's aligned correctly and complements the existing decor.
- Use a Level: To align the decal perfectly, utilize a level. This guarantees that it's straight, enhancing the overall aesthetic of the room.
- Draw Light Guidelines: To assist in accurate placement, consider drawing light guidelines on the wall. This can help maintain consistency in height and spacing, making any adjustments easier.

HOSTACK 68" Tall Kitchen Pantry Storage Cabinet, Modern Kitchen Hutch Cabinet with Doors and Shelves, Freestanding Food Pantry with Large Storage Drawer for Dining Room, Living Room, White
GENEROUS STORAGE: Featuring one large drawer and six door cabinets with shelves, this kitchen pantry cabinet offers tons...
As an affiliate, we earn on qualifying purchases.
Application Techniques

To guarantee a successful installation of your vinyl wall decor, start by thoroughly cleaning the wall surface to promote ideal adhesion. Use a multi-surface cleaner to remove dirt and grease.
Once the wall is prepped, use painter's tape to position the decal temporarily. This lets you visualize its placement, making sure it looks perfect before you commit.
When you're ready to apply the decal, begin at the top edge. Carefully peel back the release liner while smoothing the decal down with a hand applicator or a credit card. This technique helps eliminate air bubbles, making certain a flawless finish.
If you're working on a textured surface, wrap a squeegee in a soft cloth and gently press the decal into any grooves for proper adhesion.
After you've smoothed the surface, check for any persistent air bubbles. If you find them, you can puncture them with a pin to release the air.
Ensuring Smoothness

Achieving a smooth application of your vinyl wall decor is key to a professional-looking finish. Here are three essential tips to guarantee your decals adhere perfectly:
- Use a Squeegee: After you peel the backing paper, take a squeegee or credit card and burnish the decal from the center outward. This helps eliminate air bubbles and enhances adhesion to the wall.
- Address Textured Surfaces: If your wall isn't perfectly smooth, wrap the squeegee in a soft cloth. This allows it to conform better to the texture, guaranteeing the decal lays flat and adheres properly.
- Handle Air Bubbles: For any stubborn air bubbles that remain after application, gently poke them with a pin. Then, smooth the area with the squeegee to seal it flat against the wall.
Additionally, if you're dealing with particularly uneven textures, applying heat from a hair dryer on low can soften the adhesive, allowing you to smooth the decal into grooves more effectively.
Final Touches

Inspect your vinyl wall decor closely, confirming every edge is firmly adhered to the wall for a polished finish. If you notice any lifting areas, simply reapply pressure to secure adhesion. To enhance durability, think about sealing the edges with a clear adhesive like Mod Podge. This extra step will help protect your decor from wear and tear.
Allow the decal to set undisturbed for at least 24 hours; this period is essential for maximizing adhesion and guaranteeing it stays in place. If you spot any stubborn air bubbles lingering after application, don't worry! Use a pin to poke a small hole in the bubble and gently smooth it out with a squeegee. This will help the air escape and restore that smooth appearance.
To keep your vinyl wall decor looking fresh, regularly clean it with a damp cloth. This simple maintenance won't only enhance its look but also guarantee proper adhesion over time.
Frequently Asked Questions
How Do You Apply Vinyl Wall Decor?
To apply vinyl wall decor, measure your wall, position the decal with painter's tape, peel the backing, and smooth it onto the wall. Make sure to eliminate air bubbles for a smooth finish.
How to Prep a Wall for a Vinyl Decal?
Think of your wall as a blank canvas. You'll want to clean it thoroughly, wait for fresh paint to cure, and guarantee it's smooth and dry before you apply your vinyl decal for best results.
How Do You Transfer Vinyl Lettering to the Wall?
To transfer vinyl lettering to the wall, clean the surface, align with guidelines, peel the backing slowly, press firmly, and smooth with a squeegee. Finally, peel away the transfer tape for a perfect finish.
How to Apply Wall Stickers Evenly?
To apply wall stickers evenly, use a level for a straight line. Temporarily tape the decal, adjust for alignment, mark the top with painter's tape, and smooth from the center outward to avoid bubbles.
Can Cricut Wall Decor Techniques Be Used for Installing Vinyl Wall Decor?
Yes, cricut wall decor crafting tips can certainly be used for installing vinyl wall decor. With the right techniques and tools, you can create intricate and professional-looking designs to enhance your space. From cutting to weeding to applying, cricut wall decor crafting tips can help you achieve the perfect vinyl wall decor installation.
Can I Use Cricut Wall Decor Techniques for Installing Vinyl Wall Decor?
Yes, you can absolutely utilize crafting tips for cricut wall decor when installing vinyl wall decor. The precision and intricate designs achieved with Cricut can also be applied to the installation process, ensuring a seamless and professional-looking result for your space.
Conclusion
Now that you've mastered the art of installing vinyl wall decor, you can transform any space in no time!
Did you know that adding wall decals can increase a room's perceived value by up to 15%? So, not only do these decals enhance your decor, but they can also boost your home's appeal.
Enjoy showing off your creative touch, and remember, with a little practice, you'll become a pro at making your walls come alive!