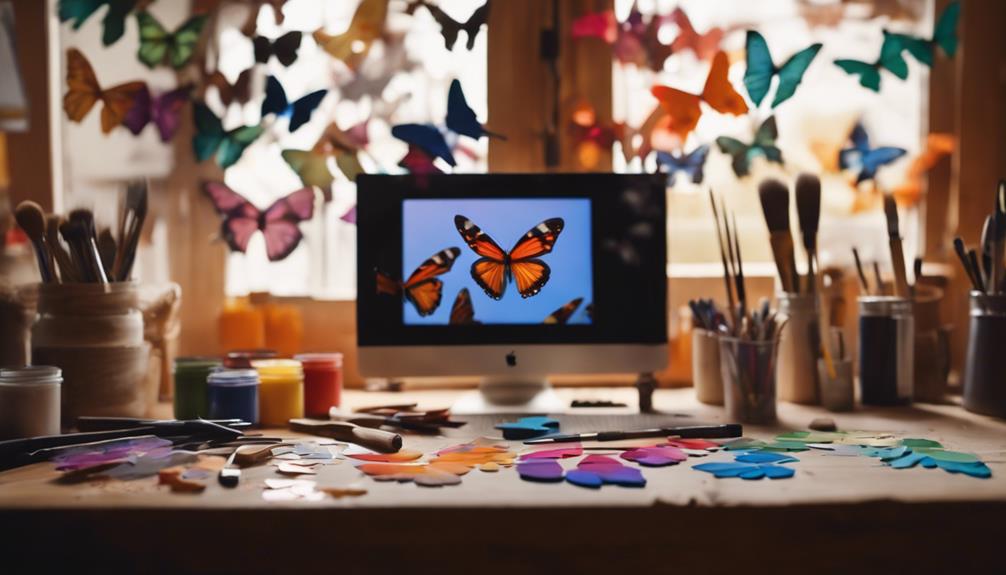
You can effortlessly craft stunning butterfly wall decor that will completely change the look of your space. First, collect vintage butterfly images and print them onto shrink plastic sheets. Once you have cut them out, leaving a small border, bake them to shrink. To add character, consider using unique backgrounds such as old maps. Place your butterflies on the background using double-sided foam pads to achieve a 3D effect. Remember to carefully balance colors and sizes for a striking display. This project not only reflects your personal style but also showcases your creativity. Stay tuned for more tips on how to elevate your butterfly decor even more!
Key Takeaways
- Gather vintage butterfly images and print them on shrink plastic sheets for vibrant decor elements.
- Use old maps as unique backgrounds to enhance the visual appeal of your butterfly display.
- Arrange butterflies creatively on a flat surface before mounting them with double-sided foam pads for added dimension.
- Experiment with size and color variations to create dynamic patterns and visual interest in your wall art.
- Incorporate greenery and seasonal themes for a cohesive and lively aesthetic in your butterfly wall decor.

SEDETA L Shaped Gaming Desk, Home Office Computer Desk with 2 Drawer and Bookshelf, L Shaped Gaming Desk with LED Light, Glass Cabinet and Storage Bag, Corner Desk with Storage Shelves, Black
【Super Spacious Desk】23.6" W desktop breaking the rules of the game. This desktop is not only spacious but...
As an affiliate, we earn on qualifying purchases.
Materials Needed
To create your stunning butterfly wall decor, you'll need specific materials that will bring your vision to life.
Start with printable inkjet white shrink plastic sheets. These will form your paper butterflies, shrinking to one-third their original size when baked. This transformation adds a unique touch to your DIY project.
Next, gather old road maps or free printable vintage maps. These will serve as a visually appealing background for your butterflies, adding character and interest.
You'll also need double-sided foam pads to securely mount the butterflies and labels, creating a delightful 3D effect.
An old picture frame and foam board are essential for constructing the backing of your artwork. Consider spray painting the frame to match your decor, ensuring everything harmonizes beautifully.
For extra flair, think about incorporating decorative elements like glitter or paint to enhance the overall aesthetic of your butterfly wall decor.

AODK L Shaped Desk Gaming Desk with LED Light & Power Outlet, 53 Inch Reversible L Shaped Computer Table with Shelf & Storage Bag & Hook for Home Office, Black
【AODK Reversible L Shape Desk】This L shaped gaming desk comes with storage shelves, power outlet, light strip, CPU...
As an affiliate, we earn on qualifying purchases.
Vintage Butterfly Preparation
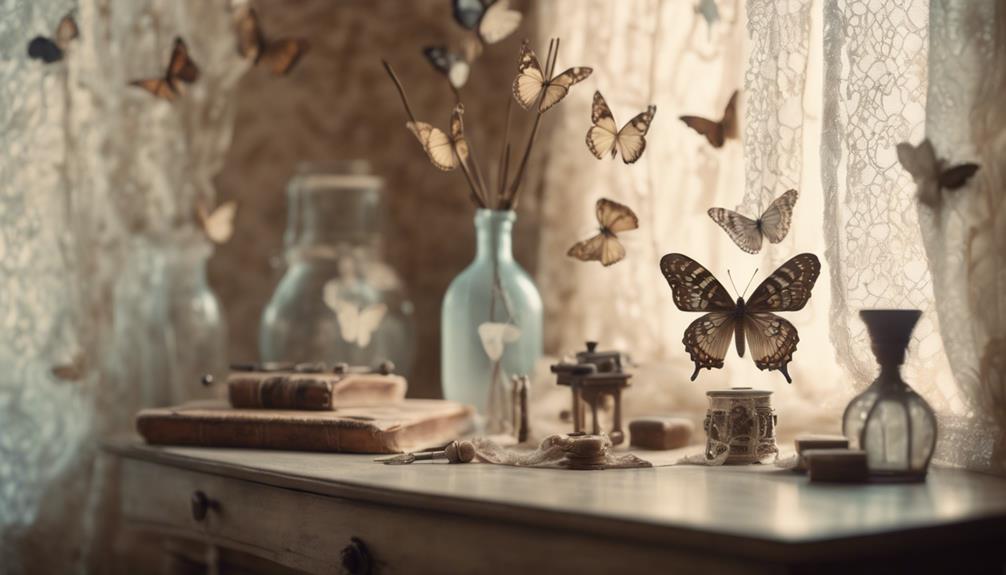
Gathering vintage butterfly images is the first step in preparing for your beautiful wall decor. You can find these charming images in historical publications or curated collections like Pictureboxblue.
Once you've collected your vintage butterfly images, follow these steps to create stunning art pieces:
- Remove Backgrounds: Use photo editing software to cut out the butterflies. This guarantees a clean and appealing design, allowing the butterflies to take center stage in your display.
- Print on Quality Material: Print your butterflies on shrink plastic sheets, using the best quality print settings. This will give you vibrant colors that shrink down to one-third of their original size when heated.
- Choose Unique Backgrounds: Consider using an old road map or other vintage materials as a backdrop. This adds depth and visual interest to your art pieces, making your butterfly display truly stand out.
Once you've completed these steps, you'll be ready to assemble your butterfly wall decor, showcasing your creativity and love for vintage designs!

Casaottima 63 Inch Electric L-Shaped Standing Desk, Reversible Corner Desk with Height Adjustment, Large Ergonomic Workstation for Home Office, Reception Room, White
Designed for home office and corner setups, this electric L-shaped standing desk supports both sitting and standing work,...
As an affiliate, we earn on qualifying purchases.
Creating Shrink Plastic Butterflies
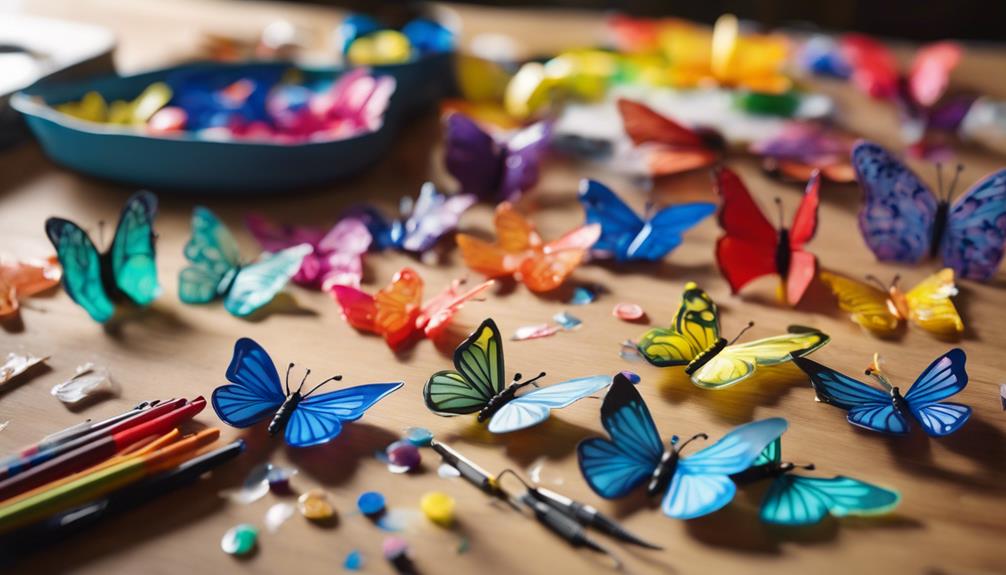
Creating stunning shrink plastic butterflies starts with printing your selected vintage images on high-quality shrink plastic sheets. Make sure to set your print settings to the best quality for ideal results. Once printed, cut out the butterflies, leaving a small white border around the edges, especially the feelers. This helps maintain their shape during the shrinking process.
Next, bake the cutouts in a preheated oven at 150°C (approximately 300°F) for 1.5 minutes. Watch as they shrink to about one-third of their original size and thicken beautifully. Don't forget to adjust the transparency of your images before printing; this can help counteract any darkening during shrinking.
Here's a quick reference table to help you through the process:
| Step | Action | Tips |
|---|---|---|
| 1. Print | Use high-quality settings | Choose your favorite butterfly template |
| 2. Cut | Leave a small white border | Focus on the feelers |
| 3. Bake | Preheat to 150°C | Keep an eye on the shrinking |
| 4. Attach | Use double-sided foam pads | Create a dynamic layered display |
Now you're ready to make the butterflies for your decor!
GABRYLLY Ergonomic Office Chair, High Back Home Desk Chair with Headrest, Flip-Up Arms, 90-120° Tilt Lock and Wide Cushion, Big and Tall Mesh Chairs for Man Woman, Black Task Chair
【ERGONOMIC OFFICE CHAIR】- The ergonomic chair provides 4 supporting points(head/ back/ hips/ hands) and a proper lumbar support....
As an affiliate, we earn on qualifying purchases.
Assembling the Wall Art
To assemble your butterfly wall art, start by arranging your butterflies and labels on the background for an eye-catching layout.
Once you've got your design just right, use double-sided foam pads to mount everything securely, adding some dimension.
Butterfly Layout Techniques
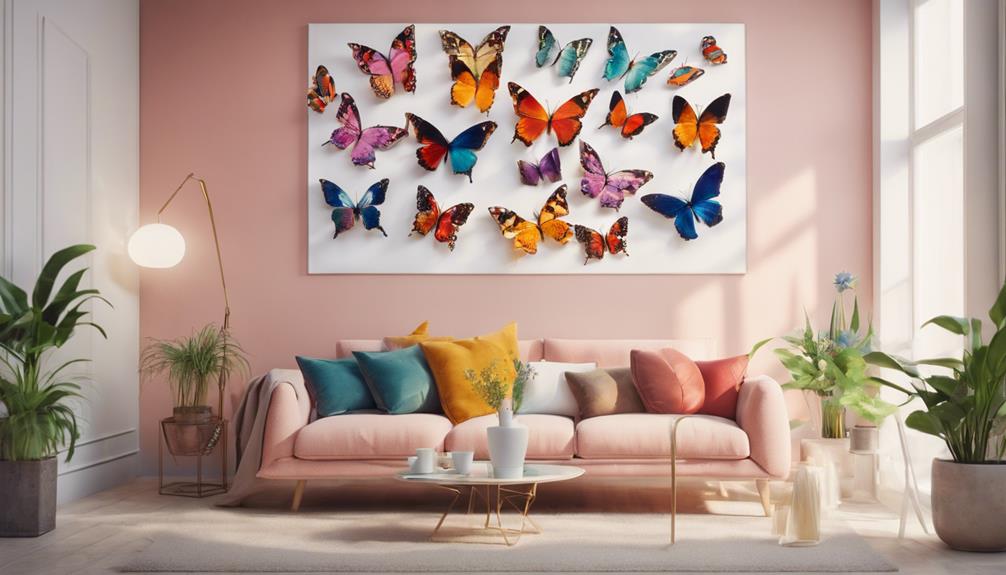
Arranging butterflies on your wall can transform your space, so think about using a random pattern to enhance visual interest and avoid wide gaps between pieces.
This butterfly layout technique invites creativity, but if you prefer structure, a grid layout can maintain a cohesive look. Here are some tips to help you get started:
- Mix Sizes and Heights: Use butterflies of various sizes and heights. This creates a dynamic display that draws the eye and adds depth.
- Layering Butterflies: Experiment with layering butterflies on top of each other or at different angles. This adds dimension and movement, making your art more engaging.
- Plan Your Placement: Before sticking anything to the wall, lay your butterflies out on a flat surface to visualize your arrangement. This step helps you see how the random pattern or grid layout will work together.
Mounting and Display Options
Choosing the right mounting and display options is essential for making your butterfly wall art truly stand out. Start by using double-sided foam pads to secure the butterflies on the background, giving them a striking 3D effect.
Before you mount anything on the wall, arrange the butterflies on a flat surface to determine their spacing and layout. This step guarantees that you'll achieve the perfect look.
Next, clean your wall surface thoroughly. A clean surface helps the adhesive stick properly, guaranteeing your display remains intact. For mounting, consider using wall adhesive or decorative pins, as these options allow for easy repositioning without damaging your wall.
To enhance visual interest, think about creating a flying pattern with the butterflies. You can also incorporate greenery around the display to elevate the overall aesthetic.
Once you've finalized your design, adhere the butterflies to the wall, making sure they're securely mounted. With these tips, your butterfly display won't only beautify your space but also reflect your personal style!
Tips for Success

To create a stunning butterfly wall decor, you'll want to choose a vibrant color palette that reflects your style.
Pay attention to butterfly arrangement techniques, as layering and varying heights can add depth to your display.
With these tips in mind, you're set for success!
Color Palette Selection
Selecting the right color palette can transform your butterfly wall decor, enhancing both your space and the overall aesthetic. To achieve the perfect look, consider these tips for effective color palette selection:
- Balance Vibrant Hues and Soft Tones: Combine vibrant hues with pastel colors for a lively yet balanced display. This mix allows your butterflies to pop while maintaining a harmonious feel.
- Incorporate Neutral Shades: Use neutral shades as your base. They'll provide a subtle backdrop, allowing the vibrant butterflies to stand out and catch the eye without overwhelming the space.
- Experiment with Depth: Don't shy away from mixing light and dark colors. Layering different shades can create depth, adding visual interest to your decor. You might even play with various sizes of butterflies for added dimension.
Butterfly Arrangement Techniques
Arranging your butterflies in a thoughtful way can elevate your wall decor, making it both eye-catching and harmonious.
Start by deciding on your butterfly arrangement style. If you prefer a structured look, use a grid pattern. This involves evenly spacing holes in a foam core, ensuring uniform placement and a clean appearance. On the other hand, a random arrangement can create a dynamic display, as long as you avoid wide gaps between butterflies.
To enhance visual appeal, vary the wire lengths of your butterflies from 3 to 9 inches. This adds depth and dimension, making your arrangement more engaging.
Pay attention to placement by balancing larger butterflies with smaller ones, helping to fill the space effectively. Incorporate a mix of colors and sizes to create a vibrant display that draws the eye.
Spring Butterfly Decorations

Bringing spring into your home with butterfly decorations instantly creates a vibrant and cheerful atmosphere, making it feel alive and welcoming. You can easily achieve this with a few simple DIY Butterfly Wall Decor projects. Here are some fun ideas to inspire your spring butterfly decorations:
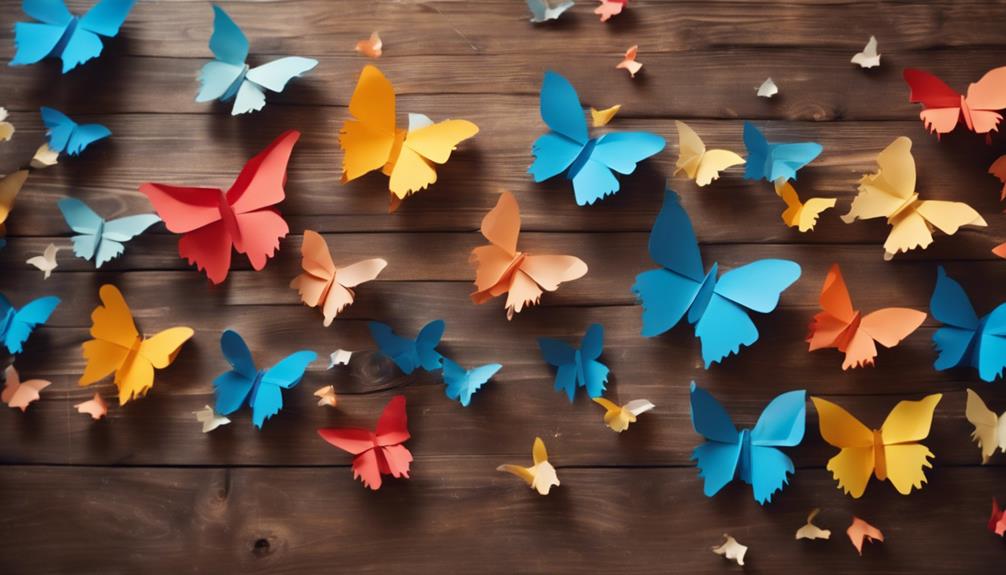
- Create 3D Paper Butterflies: Use colored cardstock or patterned paper to craft beautiful paper butterflies. They add depth and interest to your decor.
- Arrange in a Flying Pattern: When you place your butterflies in a dynamic flying pattern across your walls, it draws the eye and adds movement to your space.
- Incorporate Natural Elements: Enhance your butterfly display by pairing it with greenery. Adding plants or floral accents elevates your spring aesthetic and creates a cohesive look.
These butterfly crafts can be customized to fit any style, making it easy for you to express your creativity.
As you work on your Butterfly Craft projects, you'll not only brighten your home but also celebrate the beauty of spring. So gather your materials and let your imagination take flight!
Coordinating Decor Ideas
To create a cohesive look, choose butterfly colors and designs that complement your existing decor for a seamless integration into your space. You can use neutral cardstock to maintain a minimalistic aesthetic while allowing the butterfly shapes to stand out. This choice helps balance vibrant colors and patterns, ensuring that your wall decor remains visually appealing without overwhelming the room.
When it comes to arranging butterflies, consider creating a flying pattern. This arrangement adds visual interest and evokes a sense of movement, making your wall art dynamic and engaging. Additionally, think about incorporating greenery, like faux plants or leaves, alongside your butterfly decorations. This enhances the overall aesthetic and brings a touch of nature indoors.
Don't forget about seasonal themes! You can switch out your butterfly designs to reflect the colors and moods of different times of the year. For instance, soft pastels can inspire spring, while rich, warm hues can evoke autumn vibes. By coordinating your decor in this way, you'll create a harmonious atmosphere that feels fresh and inviting throughout the year.
Video Instructions for Crafting
Check out the video tutorial for a clear, step-by-step guide on crafting your own butterfly wall decor.
These video instructions are designed to help you, whether you're a beginner or an experienced crafter. You'll find it's fun making these beautiful butterflies from paper, and following along with the tutorial guarantees you won't miss any essential steps.
Here's what you can expect to learn from the video:
- Techniques for Assembly: You'll discover how to layer and add dimension to your butterflies, making them visually stunning.
- Material Tips: The tutorial highlights various materials and tools that optimize your crafting experience, so you can choose what works best for you.
- Display Ideas: Get insights on how to arrange and display your butterflies for maximum aesthetic appeal in your home decor.
Frequently Asked Questions
How to Make Butterfly With Paper Easy for Wall Step by Step?
To make paper butterflies, trace your template onto colored cardstock, cut them out, and layer them for depth. Fold the wings, add antennae, and secure them to your wall with tape for a charming display.
How Do You Arrange Butterflies on the Wall?
“Variety is the spice of life.” To arrange butterflies, select a layout that fits your space, mix sizes and colors, mark positions lightly, and use adhesive for easy adjustments. Create a dynamic flying pattern for visual appeal.
How to Make a Butterfly Hanging?
To make a butterfly hanging, trace and cut out butterfly shapes from cardstock, attach strings with a hot glue gun, and arrange them dynamically on your wall for a whimsical, eye-catching display.
How Do You Decorate a Simple Wall?
Did you know that 75% of people believe their home decor influences their mood? To decorate a simple wall, choose a cohesive color palette, mix textures, and arrange items in varying sizes for visual interest.
Can I Use the Same Techniques for DIY Butterfly Wall Decor for Metal Wall Decor?
Yes, you can use the same techniques for DIY butterfly wall decor for metal wall decor. There are plenty of creative metal wall decor ideas for diy enthusiasts to explore, including using stencils, paint, and different types of metal to create unique and eye-catching pieces for your home.
Can I Use Metal Wall Decor Techniques for Creating Butterfly Wall Decor?
Yes, you can use metal wall decor ideas for diy art to create butterfly wall decor. Use metal wire to form the butterfly’s body and wings, then paint the metal in vibrant colors. Add details with beads or crystals for a beautiful and unique piece of wall art.
Conclusion
Now that you've transformed simple materials into stunning butterfly wall decor, embrace the contrast of delicate artistry and bold creativity.
Your vibrant butterflies fluttering on the wall breathe life into any space, reminding you that beauty often lies in the details.
With each carefully crafted piece, you've not only enhanced your home but also cultivated a sense of joy and inspiration.
So, hang your masterpieces with pride and let them remind you of the magic in DIY artistry.