
You can easily give your space a fresh look with a DIY faux succulent wall decor that is stylish and does not require maintenance. Begin by getting a shadowbox frame and placing floral foam inside. Select a variety of colorful faux succulents and preserved moss for added texture. Use a hot glue gun to carefully arrange the plants, layering the moss for visual appeal. Once everything is in place, consider staining your frame with a trendy Bay Blue finish for an extra touch of style. Finally, hang your creation in a prominent spot to enhance your home. Keep exploring for more creative ideas and tips to enhance your decor!
Key Takeaways
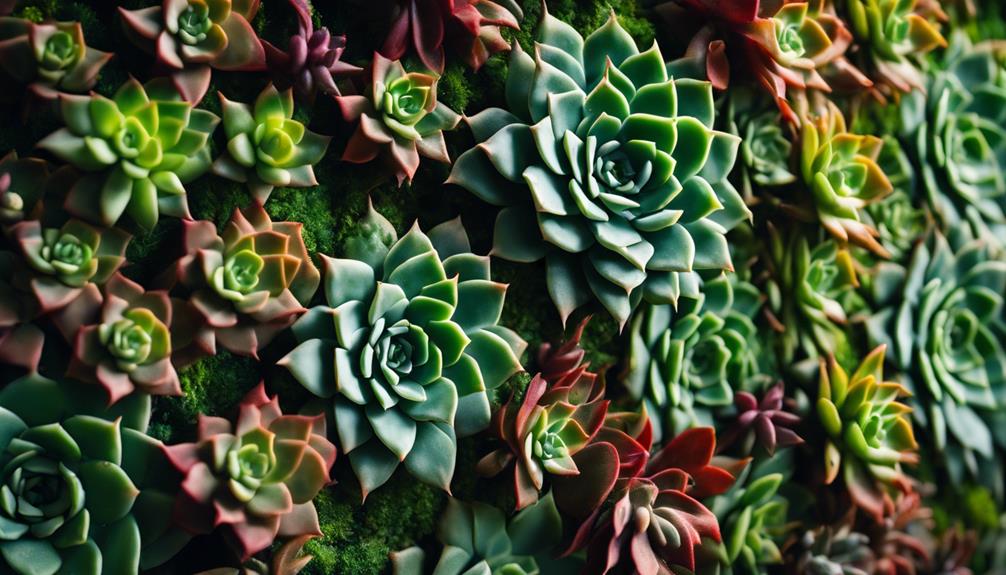
- Create a stunning faux succulent wall decor by assembling a shadowbox frame filled with floral foam and a variety of faux succulents.
- Use Bay Blue stain for a vibrant contrast, enhancing the overall aesthetic of your greenery display.
- Follow simple assembly steps, including securing chevrons and adding preserved moss for texture around succulents.
- Easily hang your completed decor using High & Mighty wall hangers for a tool-free installation.
- Maintain your decor by dusting regularly and storing it in a dry area to prevent mold growth.

HULALA HOME Genuine Leather Manual Recliner Chair with Adjustable Backrest & Footrest, Mid Century Modern Push Back Recliner with Nailhead Trim & Wood Legs-for Living Room Home Theater, Saddle
Push Back Recline: Simply lean back to recline without buttons or levers. The backrest adjusts to multiple angles...
As an affiliate, we earn on qualifying purchases.
Project Overview
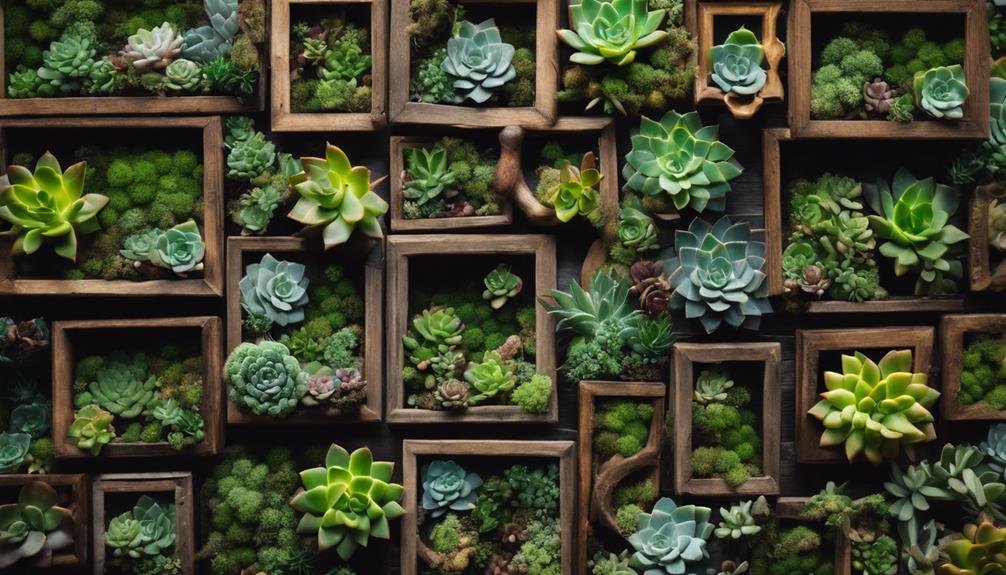
In just a few hours, you can create a stunning maintenance-free succulent wall planter that brings vibrant beauty to any indoor or outdoor space. Using faux succulents, you'll achieve the lush, green look of real plants without the hassle of upkeep. This project is perfect for those who want to enhance their decor without worrying about watering or sunlight requirements.
Your succulent wall decor can be customized to fit any size or shape, allowing you to tailor it to your specific needs. Whether you want to fill a dull corner or make a bold statement on a feature wall, the options are endless. For a trendy touch, consider staining your planter in Bay Blue, the Minwax 2024 color of the year, which adds a chic and invigorating vibe.
The assembly process is straightforward, making it easy for anyone to tackle this project. Once completed, your faux succulent wall planter will serve as a vibrant focal point that brightens up any environment, from dark corners to mantels. Embrace the beauty of greenery without the maintenance, and enjoy the eye-catching allure of your new succulent wall decor.

CHITA Genuine Leather Power Recliner Chair for Adults, Electric Wall Hugger Recliner for Small Spaces, Modern Living Room and RV Recliner Chair with Adjustable Power Headrest & Charging Ports, Brown
Comfy in All Positions: This dual-motor power recliner chair features a adjustable power headrest, which can be independently...
As an affiliate, we earn on qualifying purchases.
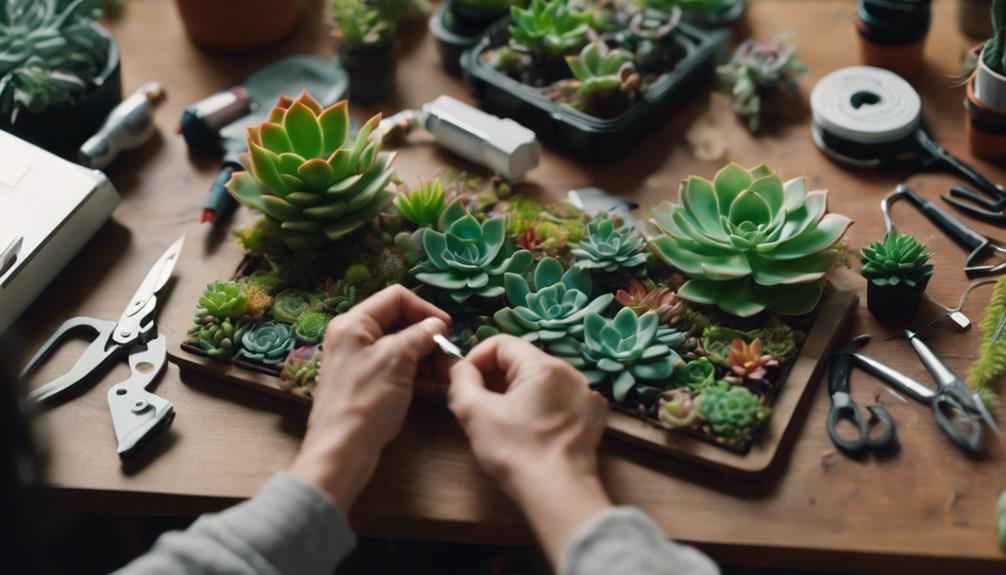
Materials and Tools

To create your DIY succulent wall decor, you'll need a few essential materials and tools.
Start by gathering a sturdy wooden frame, floral foam, and an assortment of faux succulents.
Don't forget your hot glue gun and wire cutters to make the assembly process smooth and efficient.
Essential Materials Needed
Gather the essential materials for your DIY faux succulent wall decor project, starting with a shadowbox frame that's at least 12 x 16 inches and 1.5 inches deep. This depth is vital for accommodating the floral foam and your chosen faux succulents.
Next, you'll need floral foam cut to fit snugly inside the shadowbox, as it provides a secure base for arranging the faux plants. A variety of fake succulents in different shapes and sizes will enhance your decor, while preserved moss adds an extra layer of texture and appeal.
Here's a quick reference table to help you gather all the essential items:
| Material/Tool | Purpose | Notes |
|---|---|---|
| Shadowbox Frame | Holds the arrangement | At least 12 x 16 inches |
| Floral Foam | Base for succulents | Must fit snugly |
| Faux Succulents | Main decorative element | Different shapes & sizes |
| Preserved Moss | Filler for texture | Enhances visual appeal |
| Hot Glue Gun | Secures succulents and moss | Use with hot glue |
With these materials in hand, you're ready to create your stunning faux succulent wall decor!
Recommended Tools Required
You'll need a few key tools to guarantee your DIY succulent wall decor project goes smoothly and looks professional.
First, a miter saw is essential for making precise 45-degree angle cuts on the chevron pieces, which are vital for the aesthetic of the succulent wall planter. To achieve a polished finish, use 220-grit sandpaper to smooth all wood pieces before assembly.
For attaching faux succulents and moss securely, hot glue and a glue gun are necessary. This method provides a strong bond, ensuring your greenery stays in place and looks vibrant.
When it comes to mounting your completed decor, consider a sawtooth hanger for easy installation. It simplifies the hanging process without requiring additional tools. If you want a more robust option, a High & Mighty wall hanger can support up to 20 lbs and allows for quick, tool-free installation, making it ideal for your succulent wall planter.
With these tools, you'll set yourself up for success in creating a stunning and professional-looking piece of wall decor that enhances any space.
Sourcing Quality Supplies
Sourcing high-quality materials is essential for crafting a stunning faux succulent wall decor that stands out and lasts.
Start by selecting floral foam that fits snugly in your shadowbox frame. This guarantees stability for your succulents and helps maintain the overall aesthetic of your wall art.
Next, explore craft stores like Michaels or Hobby Lobby for a variety of fake succulents in different shapes and sizes. This variety adds visual interest and realism to your faux succulent wall. For added color and texture, don't forget to include preserved moss, which you can find at floral supply stores or craft retailers.
When it comes to installation, consider using a High & Mighty 20 lb wall hanger. This tool allows for quick, tool-free mounting, making your wall art easy to display.
You'll also need essential tools like a hot glue gun and wire cutters to assemble and trim your succulents effectively.

HULALA HOME Genuine Leather Manual Recliner Chair with Adjustable Backrest & Footrest, Mid Century Modern Push Back Recliner with Nailhead Trim & Wood Legs-for Living Room Home Theater, Camel
Push Back Recline: Simply lean back to recline without buttons or levers. The backrest adjusts to multiple angles...
As an affiliate, we earn on qualifying purchases.
Staining Techniques
When it comes to staining your wood pieces, choosing the right color is key to making your succulent wall decor pop.
You'll want to apply the stain before putting everything together for easier coverage, especially in those tricky spots.
Let's explore some stain selection tips and application techniques to help you achieve a beautiful finish.
Stain Selection Tips
Selecting the right stain is vital, as it can considerably enhance the overall look of your succulent wall decor project.
When considering stain selection tips, start with Minwax Water Based Pre-Stain Wood Conditioner. This step's essential; it prevents blotching and guarantees even coverage on your wood surface.
You'll find over 240 Minwax color stains available, but for a fake succulent wall, I recommend Bay Blue. This color beautifully complements the vibrant hues of faux succulents, making them pop against the stained wood.
To simplify your project, apply the stain before assembling your wall decor. This allows you to cover every inch, especially in those hard-to-reach angles.
After staining, don't forget to finish with Minwax Polycrylic Crystal Clear Topcoat. This protective layer shields your work from scratches and scuffs, keeping your decor looking fresh.
Also, allow adequate drying time between staining and applying the topcoat. This guarantees peak adhesion of finishes and the best results for your project.
Following these stain selection tips will help you create a stunning faux succulent wall that stands out beautifully!
Application Techniques Explained
To achieve the best results in your staining project, you'll want to follow specific application techniques that guarantee even coverage and a professional finish. Here are some essential steps to keep in mind:
- Pre-stain with Minwax Water Based Pre-Stain Wood Conditioner to prevent blotching.
- Choose your stain wisely; consider colors like Bay Blue to enhance your faux succulents.
- Apply stain before assembly for easier coverage in hard-to-reach areas.
Start by prepping your wood with the pre-stain conditioner. This step is vital as it helps the stain absorb evenly, resulting in a uniform look.
Once dried, apply your chosen stain, making sure you cover all surfaces thoroughly. Remember to work in small sections for the best results, particularly in the angled areas of your vertical garden setup.
After staining, allow adequate drying time before applying a protective topcoat. Use Minwax Polycrylic Crystal Clear Topcoat to shield your stained surface from scuffs and scratches.
This final step guarantees your beautiful faux succulent wall decor remains vibrant and durable for years to come. Happy decorating!
CANMOV Leather Recliner Chair, Classic and Traditional Manual Recliner Chair with Comfortable Arms and Back Single Sofa for Living Room, Nut Brown
✿Overall Dimensions: Kindly please confirm the size before buying. Measure 40"W x 37"D x 41"H, Expanded Length –...
As an affiliate, we earn on qualifying purchases.
Assembly Instructions
Begin by applying wood glue at the connection points and securing the frame with clamps for maximum stability during assembly. This guarantees your wall hanging will remain sturdy and beautiful. Next, assemble the chevron pieces to form arrowhead shapes. Once done, attach these to the outer frame using 18-gauge nails, creating a robust structure for your succulent garden.
After nailing everything together, place foam inside the frame. Position the chevrons on top of the foam and secure them in place. This will serve as the perfect base for your faux succulents. If you want to enhance the versatility of your decor, consider adding d-rings for easy hanging and hooks for additional functionality.
Here's a handy table summarizing the assembly steps:
| Step | Action | Tools Needed |
|---|---|---|
| Apply wood glue | At connection points | Wood glue, clamps |
| Assemble chevrons | Form arrowhead shapes | None |
| Attach chevrons to frame | Use 18-gauge nails | 18-gauge nail gun |
| Secure foam in frame | Position chevrons on top | None |
| Add d-rings (optional) | For easy hanging | Drill and d-rings |
Now you're ready to create your stunning faux succulent wall decor!
Final Touches
After securing your succulents in the floral foam, it's time to add the final touches that will elevate your wall decor. These enhancements won't only make your piece stand out but also guarantee it looks fresh and inviting.
- Layer different types of moss around the base of the succulents to cover any exposed foam.
- Regularly dust the decor with a soft cloth to keep it looking pristine.
- Swap out succulents or add decorative elements like stones or figurines for a dynamic display.
To create a more natural look, the moss will blend beautifully with your faux succulents, enhancing the overall aesthetic. Once you've finished assembling everything, allow the hot glue to set completely for stability before hanging.
When you're ready to display your creation, consider using High & Mighty wall hangers for an easy installation process. These require just thumb pressure for a secure fit, so you won't need any tools.
With these final touches, your shadow box filled with faux succulents will become a stunning focal point in any room. Enjoy your new greenery!
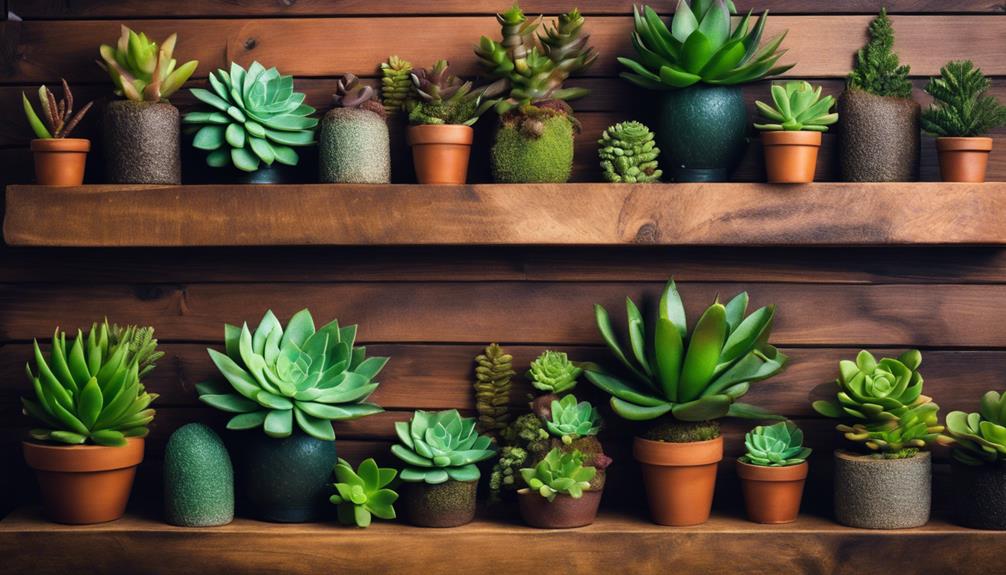
Display Ideas

Elevate your space by hanging your faux succulent wall decor in prominent locations like above your sofa or bed to create a vibrant focal point. This placement instantly draws the eye and adds a splash of color to your room.
Consider creating a gallery wall by mixing multiple pieces of succulent wall art. Combine different sizes and styles to enhance visual interest, turning your wall into a stunning garden of greenery.
If you have a dark corner or an area with minimal natural light, use a wall planter to brighten it up without worrying about the maintenance of live plants. You can also incorporate your faux succulent decor into seasonal displays, swapping out pieces or adding elements like twinkling lights to celebrate various holidays.
For a unique touch, consider using the succulent wall decor as a centerpiece on your dining table or a shelf. Surround it with complementary items like candles or decorative stones to create a cohesive look that enhances your overall decor.
With these display ideas, your faux succulents will bring life and charm to any space in your home.
Maintenance Tips

To keep your faux succulent wall decor looking fresh and vibrant, make it a habit to dust it regularly. This simple maintenance tip will help prevent dirt and debris from accumulating, allowing your decor to look so real. Use a soft cloth or feather duster to gently clean the succulents without damaging them.
Here are a few essential maintenance tips to keep in mind:
- Store in a dry area: Moisture can lead to mold growth, so guarantee your decor is kept in a dry place.
- Limit direct sunlight exposure: Prolonged exposure can fade colors and deteriorate materials, so position your decor thoughtfully.
- Refresh your display: Periodically check for any damaged or faded succulents and replace them to keep your wall decor looking fresh.
Frequently Asked Questions
How Do You Make a Succulent Green Wall?
To make a succulent green wall, start by choosing a sturdy frame. Cut floral foam to fit, layer moss, arrange faux succulents, secure them with glue, and hang your creation for an eye-catching display.
How to Make a Framed Succulent Wall Art?
Creating framed succulent wall art's like painting a living masterpiece. You'll choose a shadowbox frame, arrange faux succulents and moss, secure them with glue, and hang it effortlessly for a vibrant, nature-inspired display.
How to Plant Fake Succulents?
To plant fake succulents, choose a sturdy container and fill it with floral foam. Insert trimmed stems into the foam, arranging them as desired. Finally, add decorative elements like stones or moss for a finished look.
Can I Use Faux Succulents for My DIY Wall Decor Instead of Real Ones?
Yes, you can definitely use faux succulents for your DIY wall decor instead of real ones. Faux succulents are low-maintenance and can add a touch of greenery to your space without the need for watering or sunlight. Check out a succulent wall decor tutorial for inspiration on creating your own unique design.
Can I Use Faux Succulents for Making Wall Decor?
Yes, you can absolutely use faux succulents for how to make succulent wall decor. Faux succulents are a great alternative to real ones as they require no maintenance and can be arranged in various patterns to create stunning wall decor. Plus, they will last much longer without any water or sunlight.
Conclusion
You've turned your space into a lush oasis with your DIY faux succulent wall decor!
Remember, 'a thing of beauty is a joy forever.'
With your creativity and the right techniques, you've crafted a stunning piece that'll brighten any room.
Enjoy the process and take pride in your work, knowing that each glance at your vibrant greenery will bring a smile.
Now, hang it up, step back, and admire your beautiful creation!