To maintain tree branches for wall decor, begin by choosing strong ones with unique shapes. Thoroughly clean them using a soft brush, then let them air dry in a well-ventilated area. To preserve them, dry the branches upside down and consider applying wood stabilizers for extra protection. Once they are dry, you can add your personal touch with paint or varnish to enhance their appearance. Remember to regularly check and maintain them to prevent rot. By following these steps, you will create beautiful natural decor that reflects your creativity. There is so much more to discover in turning branches into stunning decor!
Key Takeaways
- Select sturdy, visually appealing branches free from decay to create a strong foundation for your wall decor.
- Clean branches thoroughly by removing debris and air drying them in a well-ventilated area for several days.
- Preserve branches using wood stabilizers like polyethylene glycol (PEG) and inspect regularly for signs of damage.
- Apply high-quality varnish or stain for finishing touches, ensuring proper ventilation and drying time between coats.
- Display branches creatively by combining them with lights or greenery, securing them well to enhance visual appeal.

10 Pcs Metal Tree Support, Tree Straightening Device, Branch Crutch – Prevent Branches from Breaking for Vineyards Ornamental Gardens Orchards, Fits 0.75 inch Pole, Pipe, Bamboo, Wood Stakes
What Can You Receive: You will receive 10 pcs silver metal tree support device in a gift box,…
As an affiliate, we earn on qualifying purchases.
As an affiliate, we earn on qualifying purchases.
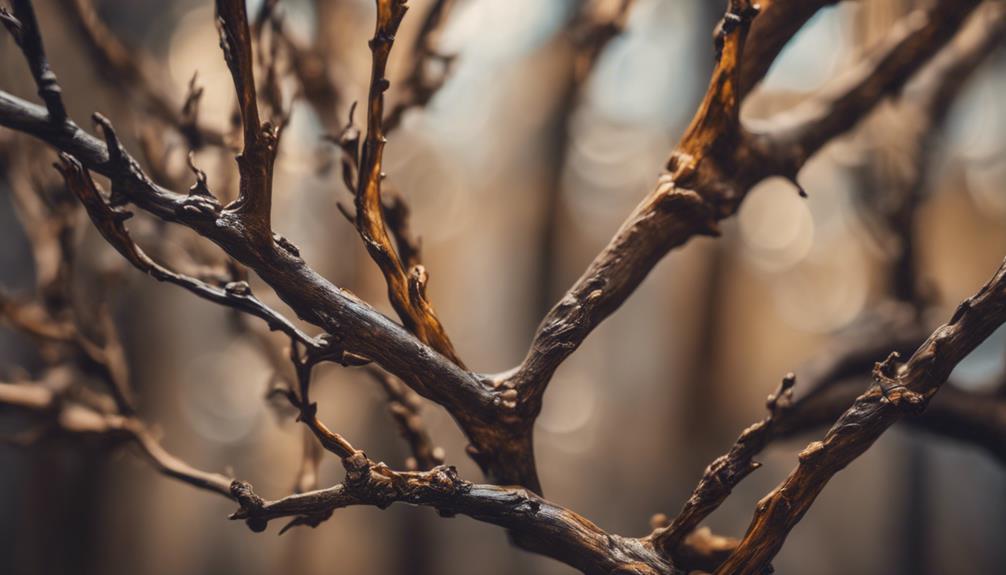
Selecting the Perfect Branch
When you're selecting the perfect branch for your decor, focus on sturdy options that boast interesting shapes and textures to enhance your space's aesthetic. Look for tree branches that stand out, whether through their twisted forms or unique surface patterns. These characteristics can transform a simple piece into stunning wall art that becomes a focal point in your home decor.
As you browse for branches, avoid those that show signs of decay or damage. Such branches not only detract from the overall look but may also break down over time, undermining your efforts. Instead, prioritize branches that are robust and visually appealing, ensuring they'll hold up well in your display. This careful selection process is essential, as it lays the groundwork for creating personalized decor pieces that reflect your style.
Once you've found the right tree branches, your creativity can take flight. Consider how they can be arranged or combined with other elements to bring your vision to life. By choosing the perfect branch, you're not just decorating; you're crafting a unique narrative within your home.

3D Wooden Floral Bathroom Wall Decor (Set of 4) Lightweight, Ready-to-Hang Framed Wall Art For Living Room, Bedroom, or Office – Premium Boho Botanical Farmhouse Decorations – Gift-Boxed
Raised 3D Floral Cutout Design – Each piece features raised wooden floral cutouts that add texture and depth,…
As an affiliate, we earn on qualifying purchases.
As an affiliate, we earn on qualifying purchases.
Cleaning and Drying

After selecting your perfect branch, it's time to clean and dry it to guarantee it looks great and lasts long in your decor. Start by gently removing any loose bark and debris; this guarantees a clean surface for preservation. Use a soft brush or cloth to thoroughly clean the branches, eliminating dirt and dust that could affect the final appearance.
Once you've cleaned the branches, allow them to air dry in a well-ventilated area for several days. This drying process is vital as it helps remove excess moisture that could lead to mold or decay. Be sure to regularly inspect the branches during this time, keeping an eye out for any signs of decay or pest activity.
It's important to confirm the branches are completely dry before moving on to preservation methods, as any remaining moisture can compromise the integrity of your decor.
Taking these steps in cleaning and drying will set you up for success in preserving the natural beauty of your branches. With careful attention, you'll have stunning wall decor that stands the test of time!

CHDITB 4Pcs Wooden Bird on Birch Tree Branch Wall Art, Boho Modern Green Leaves Silhouette Bird Laser Cut Artwork, Rustic Farmhouse Nature Wall Hanging Decoration for Living Room Bedroom(11"x 10")
Wooden Bird on Tree Wall Art: CHDITB bird wall hanging decor has a hexagonal appearance, using a combination…
As an affiliate, we earn on qualifying purchases.
As an affiliate, we earn on qualifying purchases.
Moisture Removal Techniques
Removing moisture from tree branches is essential for effective preservation, and there are several techniques you can use to guarantee ideal results.
Here's a quick guide to help you with moisture removal techniques:
- Air Drying: Place branches in a well-ventilated area, away from direct sunlight, for several days.
- Humidity Monitoring: Keep an eye on humidity levels to verify maximum drying without compromising the branch's structural integrity.
- Cleaning: Use a soft brush or cloth to remove loose bark and debris, which aids in the drying process.
- Controlled Environment: If possible, dry the branches in a shop or garage to maintain a steady drying rate.
- Cutting for Efficiency: For thick branches, cut them into smaller pieces to facilitate faster and more even drying.

Varathane Water-Based Crystal-Clear Ultimate Polyurethane | Interior Wood Protection | Fast Dry Time | Easy Clean Up | Gloss | Half Pint
Protects indoor wood surfaces such as furniture, windows, cabinets, trim and more
As an affiliate, we earn on qualifying purchases.
As an affiliate, we earn on qualifying purchases.
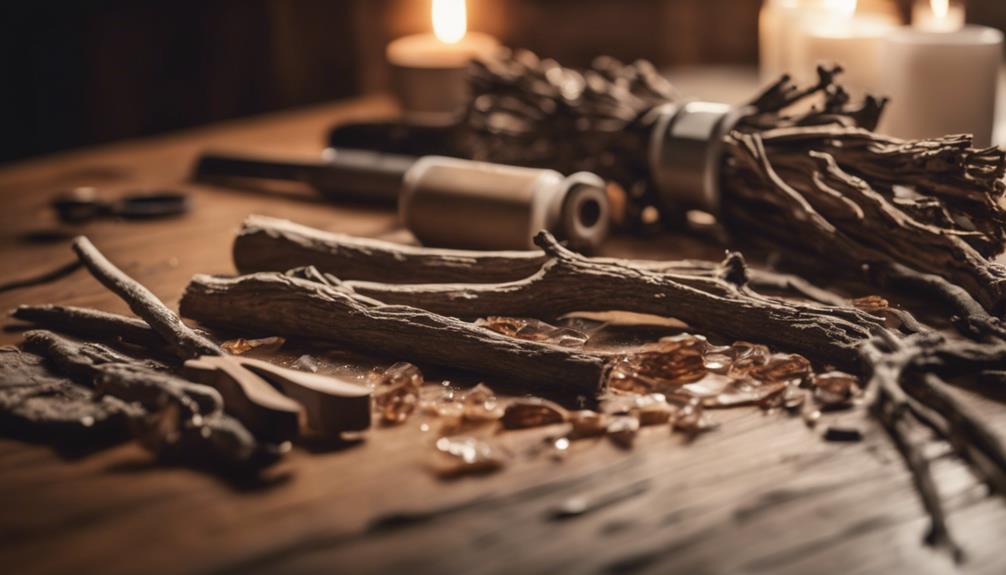
Preservation Methods
Once you've effectively removed moisture from the tree branches, you can explore various preservation methods to guarantee they last for years to come.
One popular method is air-drying, where you hang the branches upside down in a dry area. This technique may take several weeks to months, but it's a natural way to preserve your branches.
If you want quicker results, consider applying preservatives like wood stabilizers, following the manufacturer's instructions for best results. Polyethylene glycol (PEG) is an excellent option, often used in museums, as it provides long-lasting protection against decay. Just be cautious and avoid using lacquer, as it may not effectively protect your branches over time.
Once you've chosen a preservation method, don't forget about regular maintenance. Performing inspections and reapplying protective coatings can greatly prolong the lifespan of your preserved branches. This step is essential to prevent damage from environmental factors.
Applying Finishing Touches

To enhance the natural beauty of your preserved branches and protect them from moisture and decay, apply a clear varnish or wood stain following the manufacturer's instructions. This step is essential in applying finishing touches to guarantee your decor not only looks great but lasts longer.
Here are some key points to keep in mind:
- Choose a high-quality varnish or stain for better results.
- Ensure proper ventilation while applying finishes for safety.
- Apply multiple coats for maximum protection, allowing each coat to dry for at least one hour.
- Use a soft brush or cloth for an even application, avoiding drips.
- Regularly inspect and reapply protective coatings as needed to prolong the lifespan.
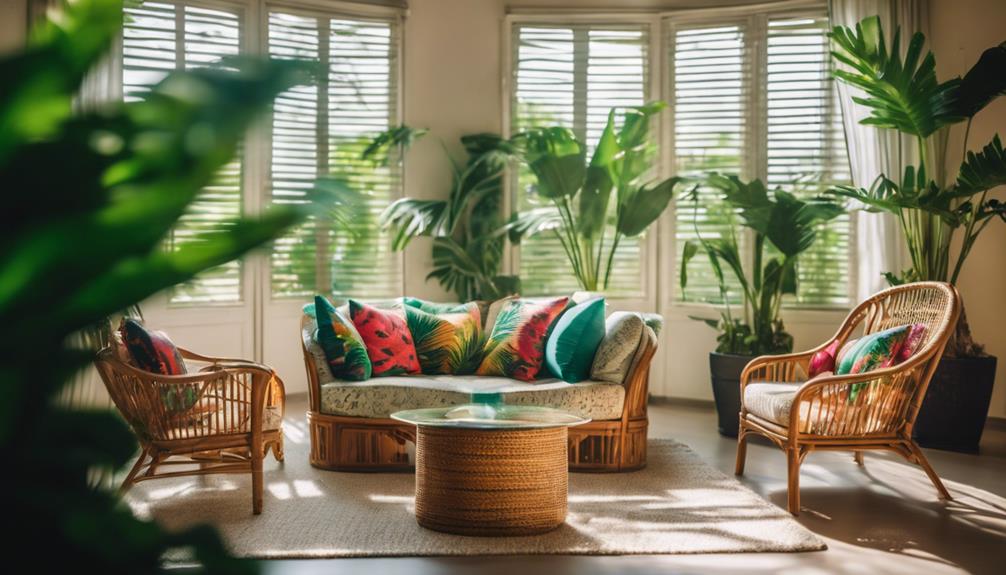
Displaying Your Artwork

Displaying your artwork with preserved branches adds a unique, organic touch that enhances your home's aesthetic. Using branches as natural frames or supports can transform any piece of art into a stunning focal point. You can arrange smaller branches in a staggered pattern to showcase photos or art pieces, highlighting their beauty and texture.
Here's a quick guide to help you visualize the possibilities:
| Display Method | Description | Benefits |
|---|---|---|
| Staggered Arrangement | Use smaller branches to create a dynamic layout | Emphasizes art's texture |
| Mobile-Style Display | Combine branches with twine to hang art | Flexible and adaptable |
| Enhanced Decor | Add greenery or lights around the branches | Creates a visually appealing focus |
Make sure the branches are securely fastened to the wall to prevent accidents. Incorporating different types of branches can also add a touch of diversity to your display. This approach not only showcases your creativity but also invites a natural element into your space, making your artwork feel even more special.
Creative Painting Techniques
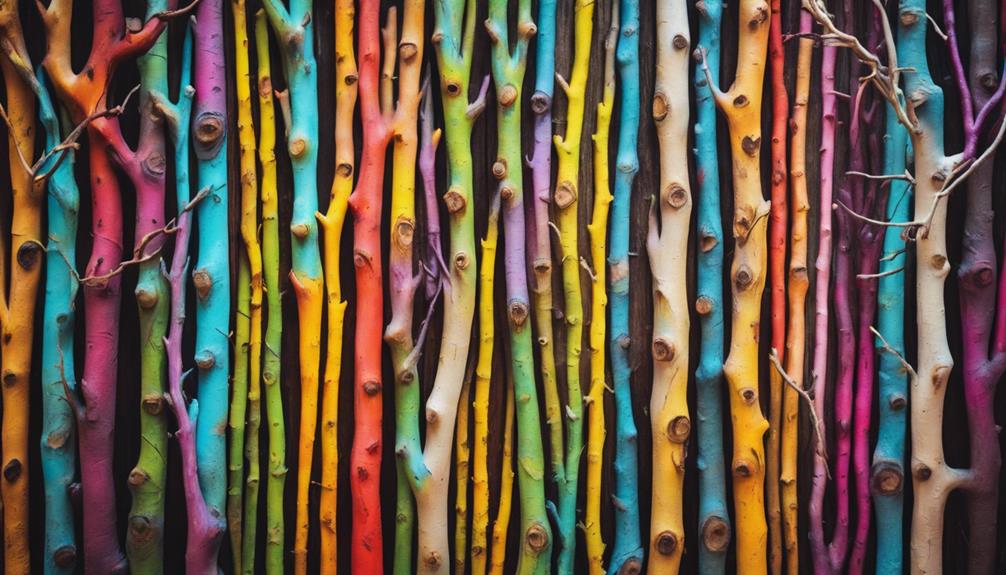
Incorporating creative painting techniques can elevate your preserved branches, turning them into striking pieces that complement your artwork beautifully. With a few simple steps, you'll find the perfect way to express your style and enhance your decor. Here are some techniques to contemplate:
- Ombre Effects: Gradually blend colors for a stunning gradient look.
- Geometric Patterns: Use painter's tape to create sharp, clean lines and unique designs.
- Layering Colors: Apply multiple coats of spray paint for depth; just let each layer dry completely first.
- Metallic Finishes: Add a touch of elegance by incorporating metallic or glitter paints as final details.
- Textured Surfaces: Lightly sand the painted surface to reveal the natural wood grain, giving a rustic touch.
Experimenting with these techniques allows you to customize your branches, ensuring they truly stand out.
Whether you're going for a modern or rustic vibe, these creative painting techniques will help you achieve a look that's uniquely yours.
Maintenance and Care Tips

To keep your preserved tree branches looking great, you need to regularly inspect them for any signs of decay.
Cleaning off dust and debris is essential to maintain their appearance, so don't skip this step.
Additionally, reapplying protective coatings will help guarantee they stay durable and beautiful over time.
Regular Inspections Required
Regular inspections of your preserved tree branches every few months help catch signs of decay, damage, or pest infestations early on. Keeping these branches in your living space can enhance your decor, but you'll want to guarantee they stay in good condition.
Consider using the following tips during your inspections:
- Check for any visible signs of decay or discoloration.
- Look for cracks or breaks in the branches that might indicate damage.
- Inspect for any pests or critters hiding in the crevices.
- Monitor the humidity and temperature around the branches to prevent mold growth.
- Reapply protective coatings if wear becomes evident.
I'm trying to keep my decor fresh and inviting, and regular inspections are an essential part of that. By staying proactive, you can maintain the beauty of your preserved branches and guarantee they remain a stunning accent in your home.
Clean Surface Buildup
Cleaning surface buildup on your preserved tree branches is vital for maintaining their beauty and preventing potential damage.
Regularly inspect your branches for any signs of decay or damage; this helps guarantee they remain visually appealing and structurally sound.
To clean the surfaces, use a soft brush or cloth to gently remove dust and debris. This simple step prevents the buildup of materials that can attract pests and promote decay.
Make it a habit to check your branches every few weeks, especially if they're displayed in areas prone to dust accumulation.
Proper storage is essential, too. Keep your preserved branches in a dry environment to minimize humidity exposure, which can lead to mold and deterioration.
Additionally, monitor environmental factors such as temperature and humidity levels, as these greatly influence the longevity of your preserved branches.
Reapply Protective Coatings
Reapplying protective coatings is essential for keeping your preserved tree branches in prime condition and extending their lifespan. You should aim to reapply coatings like wood preservatives or sealers every 6 to 12 months, depending on wear and environmental exposure. This regular maintenance helps maintain the integrity of your branches and prevents decay.
Here are some key tips to keep in mind:
- Inspect regularly: Check your branches every few months for signs of decay or damage.
- Clean surfaces: Wipe down the branches to remove dust and debris that could lead to deterioration.
- Choose the right product: Use suitable wood preservatives or sealers that provide maximum protection.
- Allow drying time: Confirm each coating dries thoroughly before applying the next layer for the best results.
- Store properly: Keep your branches in a dry environment with stable humidity and temperature to prolong their lifespan.
DIY Decor Project Ideas

You can transform preserved tree branches into stunning decor pieces that add both beauty and functionality to your home.
From a rustic ladder to a unique coat rack, there are plenty of ways to showcase your creativity.
Let's explore some unique branch art ideas and functional decor projects that you can easily tackle on your own.
Unique Branch Art Ideas
Transforming ordinary tree branches into unique art pieces can frequently elevate your home decor with a rustic charm. Here are some creative ideas to inspire your next DIY project:
- Driftwood Wall Hanger: Craft a stylish coat rack or accessory display that adds a warm touch to your entryway or bedroom.
- Floral Wall Hanging: Combine branches and colorful flowers to create a vibrant piece, perfect for weddings or as a standout decor element in your home.
- DIY Branch Ladder: Build a decorative ladder that not only looks great but can also serve as a blanket holder, enhancing your room's aesthetic.
- Twig and Twine Place Cards: Use twigs and twine to design charming place cards for events, adding a rustic flair to your table settings.
- Custom Wall Art: Get creative by painting branches or leaving them natural to make a personalized art piece that complements your room's style.
These branch art ideas not only highlight your creativity but also bring nature indoors, making your space feel unique and inviting.
Functional Decor Projects
Functional decor projects using tree branches not only enhance your living space but also serve practical purposes, making them a perfect blend of beauty and utility.
Start by creating a DIY Tree Branch Floor Lamp. This project adds rustic charm and ambient lighting, allowing you to customize the lampshade to match your style.
Next, assemble a DIY Driftwood Wall Hanger, which can serve as a functional coat rack or accessory display, adding an organic touch to your entryway or bedroom.
For events such as weddings, design a floral wall hanging or backdrop using branches and flowers, hanging them upside down to enhance their longevity.
Another versatile project is constructing a DIY Branch Ladder. It can act as a decor piece, blanket holder, or even a light display, enhancing your interior's rustic appeal.
Finally, consider making DIY Twig and Twine Place Cards for events. These simple yet charming cards add a rustic touch to your table settings and are quick and easy to assemble.
With these projects, you can effortlessly incorporate tree branches into your decor while enjoying their functionality.
Enhancing Home Aesthetics

Incorporating preserved tree branches into your home decor instantly adds a natural touch, enhancing the overall aesthetic appeal of your living spaces.
These unique elements not only beautify your environment but also create a calming atmosphere that connects you to nature.
Here are some ways you can enhance your home aesthetics with preserved tree branches:
- Eye-Catching Centerpieces: Use branches as focal points on your dining table or coffee table.
- Wall Art: Hang branches creatively on walls to serve as organic art pieces.
- Natural Textures: Combine branches with other natural materials for varied textures and visual interest.
- Personal Touch: Select branches that resonate with you to infuse your personality into the decor.
- Conversation Starters: Unique shapes and arrangements can spark discussions among guests.
Frequently Asked Questions
How Do You Preserve Tree Branches for Decorating?
To preserve tree branches for decorating, select sturdy ones, clean off debris, and let them dry. You can air-dry or use stabilizers. Finally, apply varnish for protection and check regularly for maintenance.
How to Turn Branches Into Decor?
To turn branches into decor, choose unique shapes, clean them thoroughly, and preserve their integrity. Then, apply finishes for enhancement, and display them creatively in vases or wall mounts to elevate your space's aesthetic.
Can You Use Real Tree Branches for Decor?
Yes, you can definitely use real tree branches for decor. They add a unique, rustic charm to your space. Just make certain you choose sturdy branches and clean them properly to guarantee they last.
How to Preserve Evergreen Branches for Decoration?
To preserve evergreen branches for decoration, select healthy ones, clean them thoroughly, and air-dry them upside down in a cool, dry area. Alternatively, apply a wood stabilizer for better color and decay resistance.
How can I incorporate preserved tree branches into my wall decor?
Incorporate preserved tree branches into your wall decor for unique and creative wall decor ideas. Use branches as a natural and rustic element, or paint and decorate them for a more modern look. Arrange them in a geometric pattern or as a statement piece to add a touch of nature to your home.
Conclusion
Now that you've mastered the art of preserving tree branches, imagine the stunning decor pieces you can create!
Picture your beautifully preserved branches transforming your walls into a nature-inspired gallery.
But wait—what if you could elevate that look even further with a unique painting technique or a clever DIY project?
The possibilities are endless, and the secrets to truly enchanting wall decor are just a branch away.
Are you ready to release your creativity and surprise everyone?