
Creating wall decor can be an enjoyable and satisfying project! Begin by putting together a gallery wall with a variety of frame sizes to showcase your individual style. Include mirrors to boost light and create focal points, making sure to space them evenly. Incorporate natural elements such as pressed flowers or a hat display to add a touch of nature. Consider trying out unique projects like wall murals or DIY brushstroke art to add depth. You can also create functional decor, such as bulletin boards or floating shelves, to help you stay organized while keeping your space stylish. There are endless possibilities to make your walls truly unique!
Key Takeaways
- Create a gallery wall by mixing frame sizes and arranging pieces on the floor for a balanced layout before hanging.
- Use mirrors to enhance light and create focal points, ensuring they are hung at eye level for maximum impact.
- Incorporate natural elements like pressed flowers or hats to add personal style and organic textures to your decor.
- Experiment with unique art projects like wall murals or DIY brushstroke pieces to reflect your creativity and individuality.
- Implement functional decor solutions, such as floating shelves or decorative hooks, to keep your space organized while maintaining aesthetic appeal.

BAGAIL 8 Set Packing Cubes Luggage Packing Organizers for Travel Accessories-Cream
- Premium Durable Fabric: Resists wrinkles, stains, and wear
- Water-Repellent Material: Protects clothes from spills and leaks
- Lightweight Design: Easy to pack without adding weight
As an affiliate, we earn on qualifying purchases.
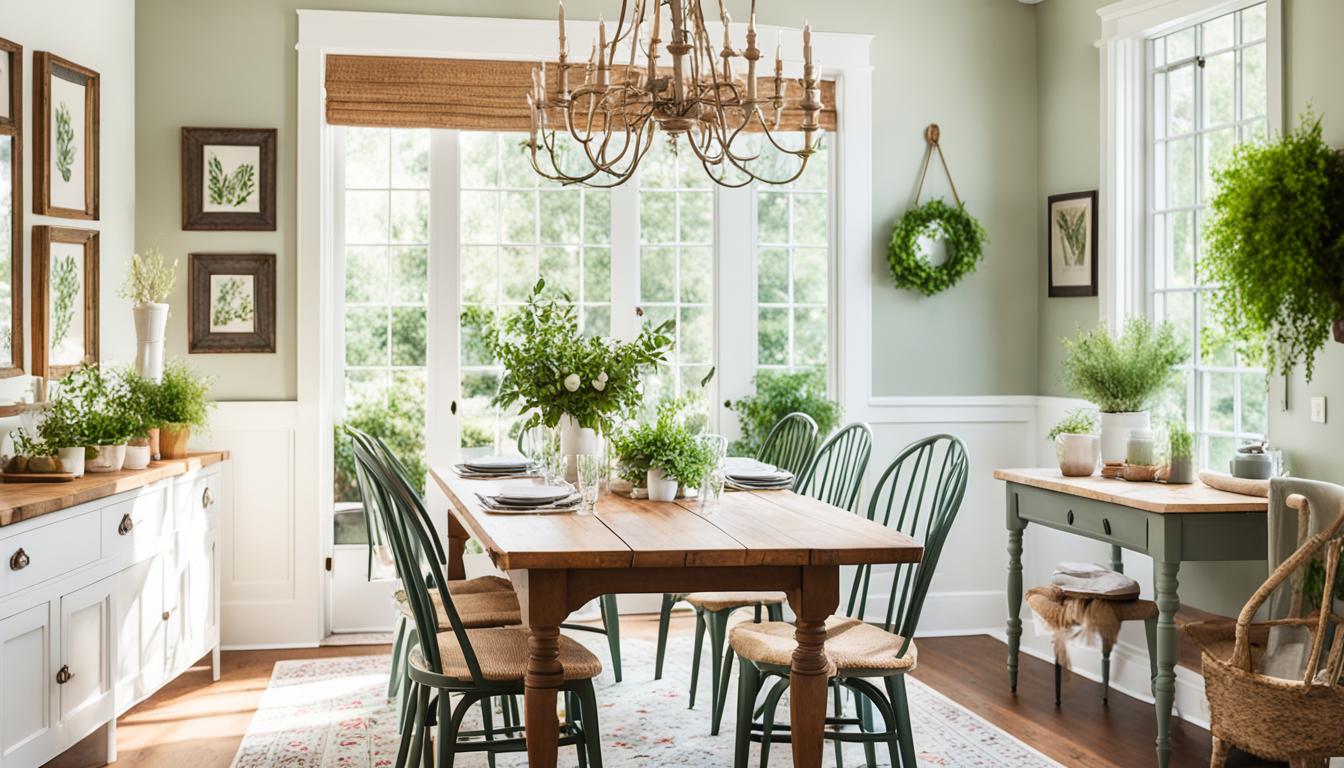
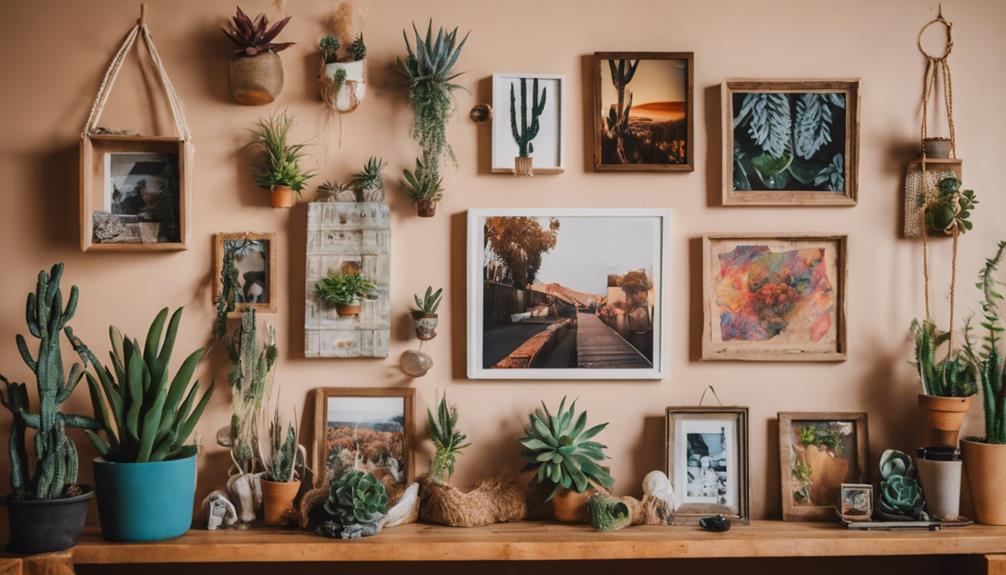
Gallery Wall Ideas
Creating a stunning gallery wall can transform your space and showcase your unique style. One of the best ways to do this is by incorporating a DIY wall art piece that resonates with you. Start by planning out how you want to create a gallery wall that reflects your personality and interests. Don't hesitate to add color; vibrant artwork can breathe life into any room.
Consider mixing different frame sizes for a dynamic look. Large-scale pieces can serve as focal points, while smaller items can complement them beautifully. To help visualize your layout, try arranging your pieces on the floor first or use painter's tape to map out the positions on the wall. Aim for 3-6 inches of spacing between frames to guarantee a balanced appearance.
Incorporating a variety of art styles—such as photographs, paintings, and mixed media—will enhance the overall visual interest. Group your art pieces around a central item to create cohesion. By thoughtfully displaying your favorite pieces, you'll create an enchanting wall decor project that truly reflects your aesthetic.
Utilizing Mirrors Effectively

When you think about using mirrors in your decor, remember they can transform the space by enhancing light and creating focal points.
Grouping smaller mirrors can add depth, while a large statement piece draws the eye.
Mirror Grouping Techniques
Grouping mirrors effectively can transform your wall decor by adding depth and visual interest to your space. To achieve a successful mirror grouping, aim for about 3-6 inches of spacing between each mirror. This spacing helps create visual balance and prevents overcrowding. Mixing different shapes and sizes of mirrors can add even more depth, creating a dynamic focal point that draws the eye.
Before you hang anything, lay your mirrors out on the floor to visualize your arrangement. This step allows you to experiment with various configurations until you find the perfect look. When you're ready to hang your mirrors, make sure they're positioned at eye level—typically 60-63 inches from the floor. This height guarantees that your mirrors are easily viewable and enhances the overall aesthetic.
Incorporating mirrors with decorative frames can elevate your wall decor style and help tie in other art pieces or furniture in the room. Whether you choose ornate, minimalist, or rustic frames, they can add an extra layer of interest to your mirror grouping. With these techniques, you'll create a stunning wall display that's both functional and stylish.
Enhancing Light Reflection
How can you use mirrors to brighten your space and create an illusion of openness? Utilizing mirrors is an effective DIY project that can transform your decor.
Start by selecting large mirrors as statement pieces. When you place them across from windows or light sources, they enhance light reflection, bouncing natural sunlight or artificial light throughout the room.
For those with smaller spaces, consider grouping smaller mirrors as wall hangings. Mix different shapes and sizes to create a dynamic gallery effect that adds depth to your empty wall. Make certain to hang your mirrors at eye level, around 60-63 inches from the floor, to guarantee they align with your sightline for maximum visual impact.
Mirrors not only brighten your space but also make it feel larger and more open. By strategically positioning mirrors, you can improve your room's overall atmosphere.
Whether you choose large mirrors or an eclectic mix of smaller ones, integrating reflective surfaces into your decor can elevate your home's aesthetic while enhancing light and space.
Don't underestimate the power of mirrors in your wall decor!
Creating Focal Points
Mirrors can serve as stunning focal points in your decor, drawing the eye and enhancing the overall aesthetic of any room. If you're looking to create a wall that stands out, consider using a large statement mirror as your centerpiece. This can transform a simple wall space into an impressive focal point, especially in smaller rooms where light and space are limited.
For a more dynamic look, try grouping smaller mirrors together to form a gallery wall effect. This DIY Abstract approach adds depth and visual interest while maximizing the reflective qualities of each piece. When hanging mirrors, aim for a height of about 60-63 inches; this aligns perfectly with eye level, creating a cohesive look alongside other decor elements.
If you're designing an accent wall, think about how the reflective surfaces can amplify the colors and textures of your existing decor. Mirrors not only enhance natural light but also serve as a beautiful way to display art and enrich the ambiance in your home.
Incorporating Natural Elements
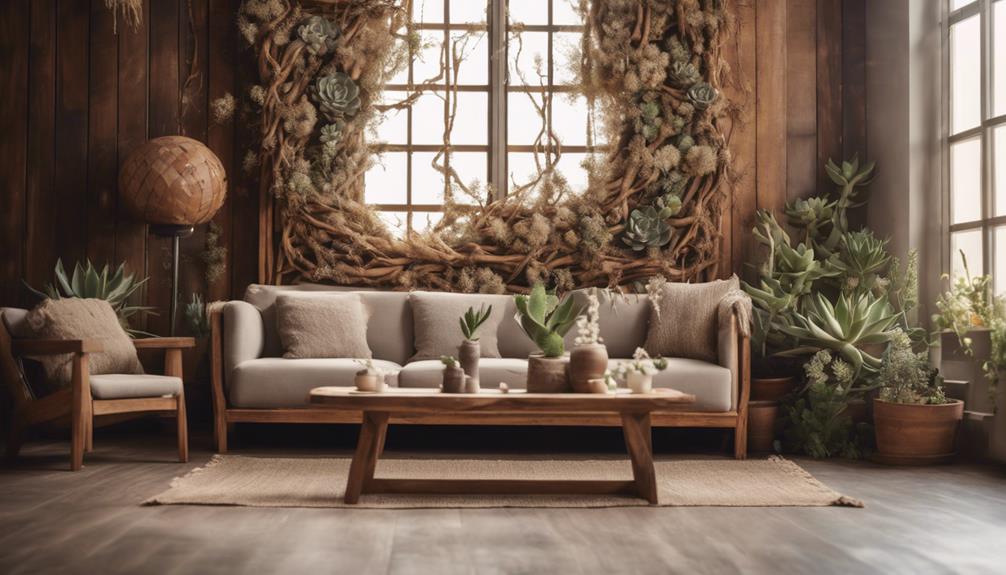
Incorporating natural elements into your wall decor can transform your space into a serene retreat.
Consider showcasing pressed flowers in float frames or arranging hats for a unique, textured display that reflects your personality.
You can also bring in organic textures and colors with items like dried herbs or twigs, creating a calming atmosphere in your home.
Pressed Flower Displays
Pressed flower displays offer a stunning way to bring nature indoors while allowing you to showcase your creativity and personal style. This DIY art project not only enhances your home decor but also serves as a unique conversation starter.
To create your own pressed flower displays, start by selecting fresh blooms, like daisies or lavender. Place them between sheets of parchment paper and apply weight to guarantee they dry flat. Leave them to dry for about 1-2 weeks for the best results.
Once your flowers are ready, consider using float frames for your display. These frames allow for a three-dimensional presentation, protecting your flowers from dust while showcasing their beauty. Think about the composition of your arrangement; layering different shapes and sizes can create a dynamic and eye-catching piece. Incorporate various flower types and colors to enhance visual interest, adding a vibrant and personal touch to your large wall art project.
Not only are these eco-friendly artworks perfect for your home decor, but they also make thoughtful, personalized gifts for friends and family. Immerse yourself in this creative endeavor, and let your pressed flower displays reflect your unique style!
Hat Wall Arrangements
Displaying hats as wall decor transforms your space, adding texture and warmth while showcasing your personal style. To create a stunning wall hanging, start by gathering a variety of hats—mix sizes and styles to enhance visual interest. When you arrange hats, make sure they're spaced 3-6 inches apart for a balanced look. This simple DIY project allows you to decorate your home in a unique way.
Consider incorporating natural elements alongside your hats. Faux greenery or wooden accents can elevate your large wall art project, creating a cohesive theme in your art and decor. You might use hooks or wall-mounted racks specifically designed for hats, keeping them organized and accessible while showcasing their designs.
For particularly special hats, think about using shadow boxes or floating frames. This not only protects them from dust but also elevates their status as decorative art pieces. By combining your favorite hats with natural elements, you'll create a vibrant and inviting display that reflects your personality and adds depth to your space.
Embrace this opportunity to enhance your decor with creativity and flair!
Organic Textures and Colors
Natural elements, like pressed flowers and feathers, can add a personal touch to your wall decor while enhancing the overall aesthetic. Incorporating organic textures and colors not only beautifies your space but also connects your indoor environment with the outdoors.
Here are some ideas to help you create colorful DIY wall art that celebrates natural materials:
- Pressed Flowers: Frame pressed flowers in a float frame to create stunning wall art that captures nature's beauty.
- Macrame Hangings: Use macrame hangings to introduce intricate textures and a bohemian vibe to your wall.
- Living Plants: Incorporate living plants or a vertical garden; they not only add vibrant green hues but also improve air quality.
- Wood Accents: Use natural wood for shelving or as a backdrop for your wall art, enhancing the organic feel of your space.
Unique Art Projects

When you're looking to add a personal touch to your walls, unique art projects can transform ordinary spaces into extraordinary displays of creativity.
Consider starting with a wall mural; it's a large wall art project that can make a statement in any room. You can use different colors to reflect your personality or the mood you want to create.
For a simpler approach, try framed sheet music. This DIY wall decor idea allows you to mix music with visual art, creating an elegant gallery wall that can evolve with the seasons.
If you're feeling adventurous, explore DIY brushstroke projects. They mimic wallpaper and let you customize colors and designs—perfect for renters wanting a temporary solution.
Layered fan art is another exciting option. With just a few simple materials, you can create dimensional art that adds texture and depth to your space.
Finally, woven paper panels are beginner-friendly and result in a timeless decorative art form, showcasing your creativity with ease.
Embrace these unique art projects to express yourself and enhance your home's atmosphere!
Functional Decor Solutions

Functional wall decor not only enhances your space but also helps you stay organized and productive. By implementing functional decor solutions, you can transform your walls into a practical and stylish haven. Here are four effective ideas to get you started:
- Command Center: Create a central hub on your wall using a bulletin board or pegboard. This space can manage schedules, to-do lists, and important reminders, keeping you on track.
- Hooks: Install decorative hooks to hang items like hats, bags, or coats. They add a touch of style while serving a practical purpose, ensuring your essentials are easily accessible.
- Floating Shelves: Use floating shelves to display beautiful decor while providing functional storage for books, plants, or personal items. This approach enhances visual interest and keeps surfaces clutter-free.
- Picture Frames: Combine aesthetics with functionality by using picture frames that double as storage for notes or reminders. This allows you to showcase memories while staying organized.
Seasonal Decor Inspiration
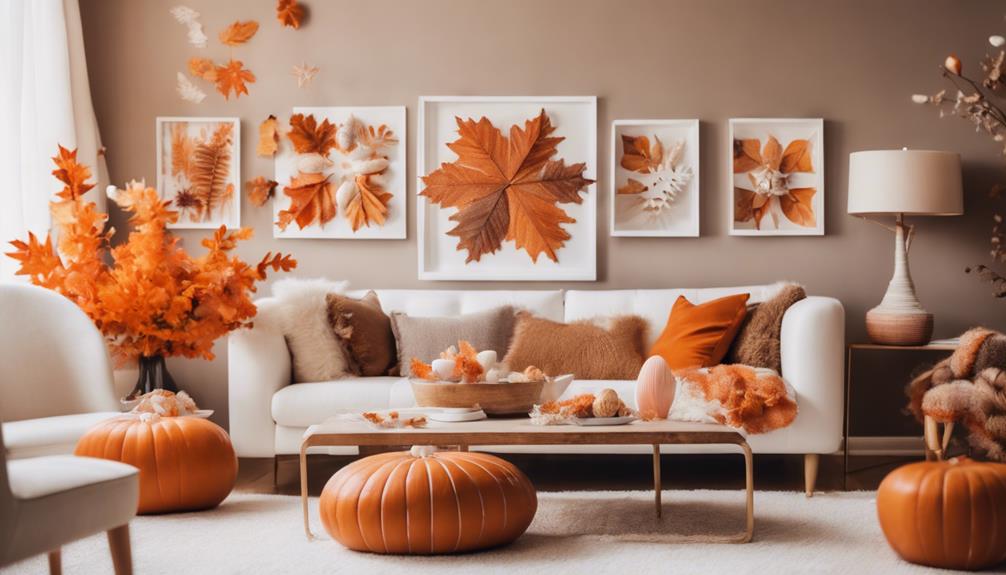
As the seasons change, revitalizing your wall decor can breathe new life into your home and create a warm, inviting atmosphere. Embracing seasonal decor helps keep your space feeling fresh. Simple swaps like colorful wreaths or themed art pieces can reflect the current time of year beautifully.
Consider incorporating natural elements, such as autumn leaves in the fall or fresh flowers in the spring. These touches enhance the seasonal feel and bring the outdoors inside. Engaging in DIY projects—like painting seasonal-themed canvases or creating garlands—adds a personal touch and can involve the whole family in this fun project.
To make the most of your blank walls, utilize seasonal color schemes. Warm oranges and browns for fall, or cool blues and whites for winter, can tie your decor elements together cohesively. Regularly rotating art displays based on holidays or seasonal themes maintains visual interest and provides exciting opportunities for creative expression throughout the year.
Frequently Asked Questions
How Do You Make Inspirational Wall Art?
To make inspirational wall art, choose a meaningful quote, gather materials like canvas and paints, add visual elements, experiment with typography, and finish with a protective coat for durability. You'll create something truly special.
How to Make Homemade Wall Decoration?
Did you know 70% of people feel more inspired in creatively decorated spaces? To make homemade wall decorations, choose a focal point, use painter's tape for designs, and incorporate natural elements for a personal touch.
How to Decorate Walls Cheaply?
To decorate walls cheaply, you can use DIY projects, repurpose items you already own, and incorporate natural elements. Print art or quotes online, and consider seasonal swaps to keep your decor fresh without breaking the bank.
How Can I Make My Plain Wall More Interesting?
Imagine your wall as a blank canvas, waiting for your touch. To make it interesting, mix frame styles, add mirrors for depth, and rotate seasonal decor—each element breathes life into your space, reflecting your unique style.
Conclusion
Now that you've gathered some DIY inspiration, let your creativity flow like a river, winding through the landscapes of your home.
Whether you're crafting a gallery wall or incorporating natural elements, each piece you create adds a personal touch that transforms your space.
Don't forget to embrace the changing seasons, allowing your decor to evolve with the year.
Immerse yourself and bring your walls to life—you've got the tools to turn your vision into reality!